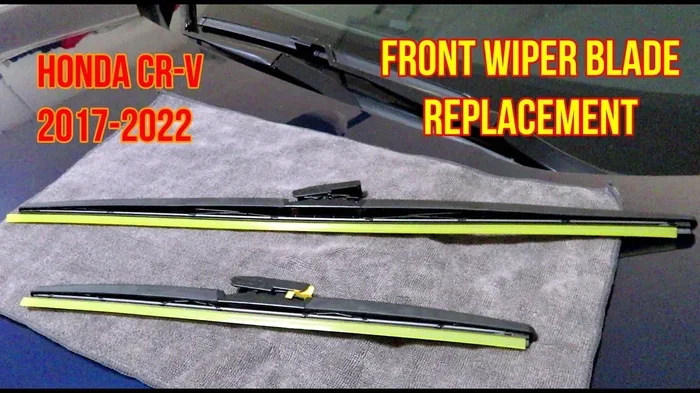

Replacing your windshield wiper blades is a quick and affordable task that keeps your Honda CR-V safe on the road. You do not need special tools or advanced mechanical skills to get the job done right. In this guide, you will learn the exact steps, the right blade sizes, and common mistakes to avoid. With clear instructions and helpful tips, you can restore smooth wiping performance in just a few minutes.
Key Takeaways
- Right blade size matters: Most Honda CR-V models use a 26-inch driver blade and a 18-inch passenger blade, but always check your owner manual.
- Simple lift and snap method: You can replace most wiper blades without tools by lifting the arm and pressing the release tab.
- Clean the windshield first: Wiping the glass with a soft cloth prevents scratches and helps new blades seat properly.
- Test before you drive: Run the wipers with washer fluid to check for skipping, chattering, or uneven contact.
- Replace both sides together: Changing both blades at the same time keeps wiping balanced and saves time later.
- Pick the right blade type: Conventional, beam, and hybrid blades each offer different benefits for noise, streak-free cleaning, and all-weather performance.
- Keep a spare in the car: Storing a backup set in your trunk helps you handle sudden storms or worn blades on long trips.
📑 Table of Contents
- Why Replacing Wiper Blades Matters for Your Honda CR-V
- Finding the Right Wiper Blade Size for Honda CR-V
- Tools and Parts You May Need
- Step-by-Step Guide to Replace Windshield Wiper Blades Honda CR-V
- Common Mistakes to Avoid
- How Often Should You Replace Wiper Blades
- Quick Tips for Longer Wiper Blade Life
- Choosing the Best Blade for Your Driving Conditions
- Final Thoughts on Replacing Honda CR-V Wiper Blades
Why Replacing Wiper Blades Matters for Your Honda CR-V
Your windshield wipers are one of the simplest parts of your car, but they play a huge role in safe driving. When rain, snow, or road spray hits the glass, you need a clear view right away. Worn blades can leave streaks, skip across the glass, or miss spots entirely. That can make night driving and bad weather much harder to handle.
Many drivers wait until the wipers start squeaking or smearing before they think about replacement. That is a common mistake. A quick check every few months can save you from a sudden visibility problem. If you drive a Honda CR-V, you already know this vehicle is built for everyday comfort and reliability. Keeping the wipers in good shape is an easy way to protect that smooth driving experience.
The good news is that this is one of the easiest maintenance tasks you can do at home. You do not need a mechanic, and you usually do not need tools. With the right blades and a few minutes of time, you can restore clean, quiet wiping performance. If you want a broader look at simple car care tasks, you may also enjoy reading about how often change synthetic oil Toyota, since regular upkeep keeps many parts of your vehicle running better.
Finding the Right Wiper Blade Size for Honda CR-V
Before you buy anything, you need the correct blade length. Honda CR-V wiper sizes can vary slightly by model year and trim level. In many cases, the driver side uses a longer blade and the passenger side uses a shorter one. A common setup is a 26-inch blade on the driver side and an 18-inch blade on the passenger side. Still, you should always confirm the size for your exact vehicle.
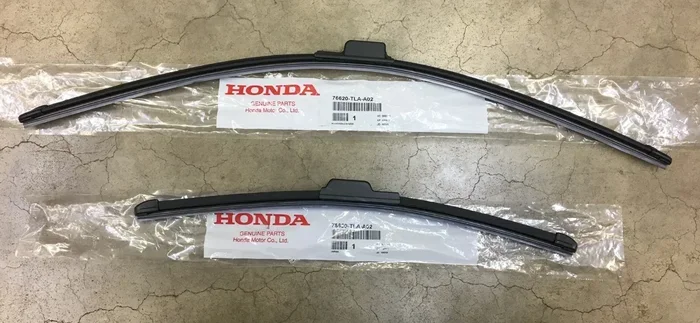
Visual guide about Honda CR-V wiper blade replacement
Image source: i.ebayimg.com
You can check the owner manual, measure the old blades, or use an online fit guide. Measuring is simple. Just lift the wiper arm and measure from the center of the mounting point to the tip of the blade. If you have a tape measure, this takes only a minute. If you are unsure, match the old blade length closely and check the package details before installing.
Blade type matters too. You will usually see three main styles:
- Conventional blades: These use a frame with multiple pressure points. They are affordable and widely available.
- Beam blades: These have a sleek, frameless design that often handles snow and ice better. They can look more modern and may reduce streaking.
- Hybrid blades: These combine a low-profile cover with a supported frame. They aim to give you a balance of durability and smooth wiping.
If you live in a place with heavy rain, beam blades can be a strong choice. If you want a budget-friendly option, conventional blades may be enough. Either way, make sure both blades are designed for your wiper arm connection. If you also want to keep your cabin air fresh while you are improving visibility, check out how to change cabin air filter Toyota Camry for another easy DIY task.
Tools and Parts You May Need
One of the best things about this job is that it usually requires very little equipment. In many cases, you only need the new wiper blades and a clean cloth. Still, it helps to gather a few small items before you begin so the process stays smooth.
Here is a simple checklist:
- New wiper blades: Confirm the size and attachment style for your Honda CR-V.
- Soft microfiber cloth: Use this to clean the glass and wipe the wiper arm.
- Gloves, optional: These can keep your hands clean if the blades are dirty.
- Washer fluid, optional: This helps you test the wipers after installation.
- Small towel or pad, optional: Place it under the wiper arm so it does not scratch the glass if it slips.
In most cases, you will not need a screwdriver or pliers. Many wiper blades use a simple clip or locking tab that you can release by hand. If your vehicle uses a slightly different connector, the package often includes an adapter. That makes the install easier for a wide range of cars.
A clean work area also helps. Try to park in a shaded spot if possible. Direct sun can make the windshield hot and may cause washer fluid to dry too quickly during testing. A cooler surface makes the job more comfortable and the cleanup easier.
Step-by-Step Guide to Replace Windshield Wiper Blades Honda CR-V
Now let’s walk through the replacement process. The goal is simple: remove the old blades, attach the new ones, and test them before you hit the road. Take your time and keep the wiper arm from snapping back against the glass. That is the most important safety step in the whole job.
Prepare the Vehicle and Lift the Wiper Arms
Start by turning off the car and making sure the wipers are in the off position. Then lift the wiper arms away from the windshield. Most Honda CR-V wipers rest in a parked position below the base of the glass, so you will need to raise them carefully. If the arms feel stiff, do not force them. Move them gently until they lock in the upright position.
Before removing anything, take a moment to look at the old blades. Check for cracking, splitting, or bent frames. This can tell you whether the blades failed from age, weather, or pressure. It also helps you spot any issues with the wiper arm itself. If the arm looks bent or loose, that may affect how the new blade sits on the glass.
Remove the Old Wiper Blades
Once the arm is up, find the small attachment point where the blade connects to the arm. On many wipers, there is a tab or latch you can press with your thumb. Press the tab and slide the blade downward or off the arm hook, depending on the design. The movement should feel smooth. If it resists, check for a second latch or adapter before applying more force.
After the blade comes off, keep the arm under control. Wiper arms are spring-loaded, and they can snap back quickly. That can crack the windshield or damage the blade linkage. A small towel placed under the arm can add a layer of protection while you work. If you are replacing both sides, repeat the same process on the other wiper arm.
This is also a good time to compare the old blade and the new one. Make sure the length looks right and that the connector matches. If the new blade came with multiple adapters, choose the one that fits your arm securely. A proper fit prevents wobbling and helps the blade stay centered during use.
Attach the New Wiper Blades
Now install the new blades. Line up the connector with the arm and slide it into place until it clicks or locks. You should feel a firm connection. Gently tug on the blade afterward to confirm it is secure. If it slips, reseat it and check the locking mechanism again.
Be careful not to overtighten anything if your setup uses a screw-on adapter. Most Honda CR-V wiper blades use a snap-on style, so you usually only need a clean connection. Once both blades are attached, lower the arms back to the windshield slowly. Let them rest naturally on the glass without dropping them.
If you want a smoother install experience, wipe the wiper arm connection before attaching the new blade. Dust or grit can interfere with the lock and may cause the blade to loosen later. A quick wipe takes only a second and can help the blade seat more reliably.
Test the Wipers and Check for Proper Contact
After installation, test the wipers before driving. Turn the car on and run the wipers with washer fluid if you have some available. Watch how the blades move across the glass. They should sweep smoothly without skipping, chattering, or leaving heavy streaks. A little residue at first is normal if the windshield was dirty, but the wipe should still look even.
If the wipers make noise or bounce, there may be a fit issue or the blades may not be seated correctly. Lift the arm again and check the connection. Also inspect the blade orientation. Some wiper blades can be installed backward if the connector is not aligned properly. A quick recheck usually solves the problem.
You should also test the full range of motion. Make sure the wipers do not hit the car body or the washer nozzles. If everything looks clean and quiet, you are ready to go. For another simple vehicle task that helps keep your car feeling fresh, you might also look at how to change cabin air filter in Toyota Corolla as a comparison of easy maintenance jobs.
Common Mistakes to Avoid
Even though this is a simple job, a few mistakes can cause trouble later. Avoiding them will save you time and keep your windshield safer.
- Letting the wiper arm snap back: This is the biggest risk. Always lower the arm carefully or place a protective cloth under it.
- Buying the wrong size: A blade that is too long or too short can reduce coverage and may hit the car body.
- Ignoring the attachment style: Not all connectors are the same. Make sure the new blade matches your arm or includes the right adapter.
- Installing a dirty blade: Dust and debris on the rubber or glass can cause streaking right away.
- Replacing only one blade: If one blade is worn, the other is likely aging too. Changing both keeps wiping balanced.
- Skipping the test run: Always check the wipers before driving in rain or snow.
If you notice the wipers still streaking after installation, clean the windshield thoroughly. Sometimes old residue builds up on the glass and affects performance. A good glass cleaner and a microfiber cloth can make a big difference. If the issue continues, inspect the blade connection again and confirm the rubber is sitting flat against the windshield.
How Often Should You Replace Wiper Blades
There is no single calendar date for every driver, because weather, sun exposure, and usage all affect blade life. In general, many wipers last about six months to a year. In hot climates, the rubber can dry out faster. In cold or snowy regions, ice and road salt can wear the blades down sooner.
A good habit is to inspect the blades every few months. Look for cracked rubber, bent frames, or areas where the blade no longer touches the glass evenly. If you notice reduced performance, replace them sooner rather than later. Visibility is not something you want to gamble with.
You may also want to change blades before a long trip or a season with heavy rain. That way, you start with reliable wiping instead of waiting for a problem. If you are already planning a maintenance routine, you can pair this task with other simple checks like fluid levels, tire condition, and light function.
Quick Tips for Longer Wiper Blade Life
A few small habits can help your new blades last longer and perform better. These tips are easy to follow and do not take much time.
- Clean the windshield regularly: Dirt and bug residue can wear down the rubber faster.
- Use washer fluid before wiping: Dry wiping on a gritty windshield can damage the blade edge.
- Park in the shade when possible: Less sun exposure can help reduce rubber drying.
- Lift blades in heavy snow: If you expect freezing conditions, lifting the blades can reduce ice bonding.
- Avoid using wipers as scrapers: Clear ice and frost manually before turning the wipers on.
These habits are simple, but they add up. A little care can help your blades stay flexible and clean for longer periods. That means fewer streaks, less noise, and better visibility when the weather turns bad.
Choosing the Best Blade for Your Driving Conditions
Not all wiper blades are best for every driver. Your choice should match your local weather and your daily driving needs. If you mostly drive in light rain and want a low-cost option, a conventional blade may be enough. If you deal with snow, freezing rain, or strong sun, a beam blade may hold up better and wipe more consistently.
Hybrid blades are a middle ground. They often look neat and can offer a smoother wipe than basic framed blades. Some drivers also prefer them because they feel more stable at higher speeds. The best option is the one that fits your car, your budget, and your weather conditions.
If you are comparing options, think about these points:
- Noise level: Some blades are quieter than others during operation.
- Streak resistance: A quality blade should leave the glass clearer with less smearing.
- Weather coverage: Snow and ice can challenge weaker frames.
- Fit and ease of install: The right connector makes replacement much easier.
If you ever need to troubleshoot a vehicle issue beyond the wipers, it can help to understand how other simple systems work too. For example, learning how to clear Toyota maintenance light can be useful when you want to reset reminder indicators after routine service.
Final Thoughts on Replacing Honda CR-V Wiper Blades
Changing your wipers is one of the easiest ways to improve safety and comfort in your Honda CR-V. With the right size, a careful install, and a quick test, you can get back to clean, reliable wiping in minutes. It is a small task, but it makes a big difference when the weather turns rough.
Remember to check both blades, protect the windshield during installation, and choose a blade style that matches your driving conditions. If you keep a simple maintenance routine, your car will stay easier to care for and more pleasant to drive. Clear visibility starts with good wipers, and good wipers start with a proper replacement.
Frequently Asked Questions
What size wiper blades does a Honda CR-V need?
Most Honda CR-V models use a 26-inch blade on the driver side and an 18-inch blade on the passenger side, but you should confirm the size for your exact model year. Measuring the old blades or checking the owner manual is the safest way to be sure.
Do I need any tools to replace windshield wiper blades Honda CR-V?
Usually, no. Most wiper blades snap on and off by hand, so you only need the new blades and a clean cloth. If your connector is different, the package may include an adapter that makes installation easier.
Why are my new wiper blades streaking on the windshield?
Streaks often happen because the glass is dirty or the blade is not seated correctly. Clean the windshield thoroughly and check that the blade is locked in place. If the problem continues, inspect the rubber for damage or improper contact.
Can I replace just one wiper blade on my Honda CR-V?
You can, but it is usually better to replace both at the same time. Replacing both sides keeps wiping balanced and prevents the older blade from failing soon after the new one is installed.
How do I know when my wiper blades need replacing?
Common signs include streaking, skipping, squeaking, and visible cracks or splits in the rubber. If the blades no longer clean the glass evenly, it is time to install a new set.
What is the safest way to lower the wiper arm after installation?
Lower the arm slowly and gently so it does not snap back against the glass. If you want extra protection, place a soft cloth under the arm before guiding it back into position.