
Creating an Amazon wedding registry is fast, free, and incredibly easy. You can add items from millions of products, track gifts, and even get completion discounts. This guide explains exactly how to set up an Amazon wedding registry step by step so you can start adding gifts in minutes. Follow these simple instructions and your registry will be ready to share with friends and family right away.
Planning a wedding comes with a long list of tasks. Picking a venue, booking vendors, and sending invitations can feel overwhelming. One task that should stay simple is creating your gift list. If you want a stress-free way to collect household items, learning how to set up an Amazon wedding registry step by step is a smart move. Amazon makes the process smooth, and you can finish it in a short session.
Many couples choose Amazon because the store offers almost everything. You can add kitchen tools, bedding, electronics, baby items, and more. Guests also like it because they can shop from home and have gifts shipped directly to you. The best part is that you do not need special skills or tech knowledge. You just need an Amazon account and a little time.
In this guide, you will learn the full process from start to finish. I will walk you through account setup, adding items, customizing your list, and sharing it with guests. You will also get practical tips for keeping your registry organized and helpful advice for tracking gifts. Let us jump in and make your registry ready for the big day.
Key Takeaways
- Free to create: Amazon wedding registries cost nothing to set up and maintain.
- Huge product selection: You can add items from almost any category on Amazon.
- Easy sharing: Send your registry link via email, text, or social media instantly.
- Purchase tracking: The dashboard shows what guests have bought and what remains.
- Completion discount: Eligible couples can receive a discount on remaining registry items.
- Mobile friendly: The Amazon app makes adding and managing items quick and simple.
- Privacy controls: You decide who can view your registry and what information to share.
📑 Table of Contents
- Create Your Amazon Account or Sign In
- Start Your Registry and Choose the Basics
- Add Items the Smart Way
- Customize Your List for a Better Guest Experience
- Share Your Registry and Track Gifts
- Manage Your Registry Before and After the Wedding
- Expert Tips for a Smooth Registry Experience
- Final Thoughts on Building Your Registry
Create Your Amazon Account or Sign In
The first step is simple. You need an Amazon account to build a registry. If you already shop on Amazon, you can use your existing login. If you do not have an account yet, creating one takes only a minute.
Start by visiting Amazon on a computer or opening the app on your phone. Tap or click the sign-in option, then choose the create account link if needed. Enter your name, email address, and a strong password. After that, confirm your email and finish the quick setup steps.
Once you are signed in, you have access to the full registry system. It helps to use an email address you check often. That way, you will not miss important updates about gifts, shipping, or registry changes. If you share the account with a partner, make sure both of you know the login details or set up separate accounts and link them later.
Why a Shared Account Can Work Well
Some couples prefer one shared account, while others keep separate accounts. A shared account can make managing the registry easier because both people can edit the same list. Separate accounts can work too, especially if each person wants their own login. Either way, the registry tool is flexible and can fit your style.
Start Your Registry and Choose the Basics
After signing in, the next step in how to set up an Amazon wedding registry step by step is to open the registry tool. You can usually find it by searching for registry on Amazon or by going to the gift registries section. Select the option to create a new registry and choose wedding as the event type.
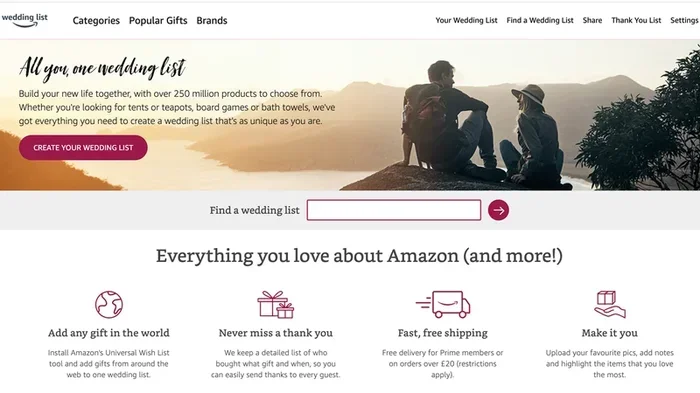
Visual guide about Amazon wedding registry setup
Image source: images.techadvisor.com
Amazon will ask for a few basic details. These typically include your name, the event date, and a registry name. Keep the name simple and clear so guests can recognize it right away. You may also be asked to enter a delivery address. This is where gifts will be sent, so double-check that it is correct.
You can often choose a start date and an end date for the registry. The start date can be the day you create it, and the end date can be near your wedding or a little after. This helps guests understand the timeline and keeps your list active for the right period.
Pick a Clean, Easy-to-Remember Registry Name
A good registry name makes sharing easier. Avoid long or confusing titles. Short names are better because they look neat in emails and text messages. If you want, you can include your names or the word wedding, but keep it simple.
Add Items the Smart Way
Now comes the fun part. You get to choose the items you actually want and need. Amazon gives you several ways to add products, and each method is easy to use. You can browse categories, search for specific items, or use the suggested list if you want quick ideas.
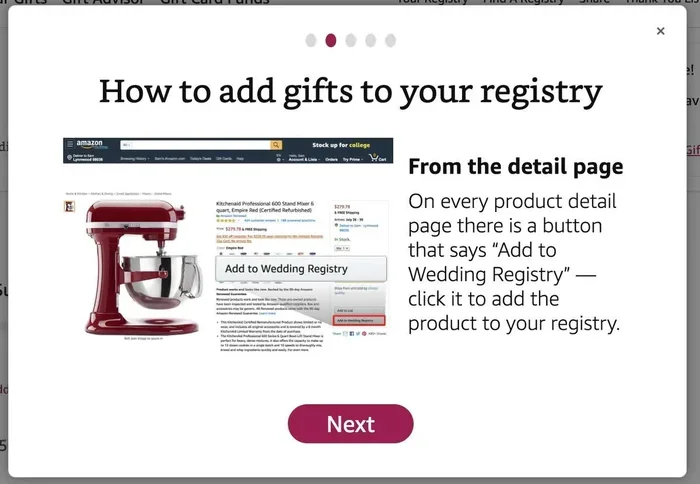
To add an item, open the product page and look for the option to add it to your registry. Select the quantity you want, choose a variation if needed, and save it. You can repeat this process as many times as you like. There is no strict limit, so you can build a list that feels complete.
If you are unsure where to begin, think about the items you use every day. Many couples start with kitchen essentials, then add home comfort items, and finish with personal favorites. This keeps the registry practical and useful.
Use Categories to Stay Organized
Browsing by category can save time. Common registry categories include:
- Kitchen and dining tools
- Bedding and bath items
- Home decor and storage
- Small appliances
- Baby and family items
- Personal care and wellness products
Grouping items by category also helps guests shop faster. If someone wants to buy you a gift but does not know what you need, a well-organized list makes it easier for them to choose.
Customize Your List for a Better Guest Experience
A registry is more than a list of products. It is also a way to make gift shopping easy for your guests. Amazon lets you adjust settings so your registry feels personal and clear. You can set price ranges, add notes, and decide how much information to show.
One helpful feature is the ability to add a variety of price points. Not every guest has the same budget, so offering options at different levels is thoughtful. Include a mix of affordable items and a few higher-value choices. That way, everyone can find something that fits their comfort level.
You can also write short notes for certain items if you want to explain why you chose them. This is optional, but it can be useful. For example, you might note that you prefer a specific color, size, or style. Small details can prevent duplicate gifts and make your list more helpful.
Keep Your List Realistic and Useful
It is tempting to add everything you admire, but a focused list works better. Think about what you will truly use in your home. A practical registry is easier for guests to shop from and more satisfying for you to receive.
A few good habits for a balanced registry include:
- Add items you need now or soon after the wedding
- Include a mix of small and larger items
- Avoid duplicates by checking your list regularly
- Remove items you no longer want
- Update quantities if you receive multiple gifts of the same item
Share Your Registry and Track Gifts
Once your registry looks good, it is time to share it. Amazon provides several easy sharing options. You can send the link by email, copy it for text messages, or post it on social media if you want. You can also print a QR code or share a direct link at your wedding if that fits your plan.
When guests visit your registry, they can see the items, prices, and availability. They can select a gift, choose a delivery date, and add a message if they want. This makes the whole process smooth and convenient.
Tracking gifts is another major benefit. The registry dashboard shows what has been purchased and what is still available. This helps you stay organized and avoid confusion. It also lets you see which items are popular so you can adjust your list if needed.
Help Guests Find Your Registry Quickly
The easier your registry is to find, the more likely guests are to use it. A clear link and simple instructions go a long way. If you are sending it by email or message, include a friendly note and the direct link. If you are printing it for a wedding website or invitation suite, make sure the link is short and readable.
You can also mention that guests can ship gifts directly to your home. That is one of the biggest advantages of using Amazon. It saves time and removes the stress of carrying gifts around.
Manage Your Registry Before and After the Wedding
Your registry does not have to stay frozen once it is created. You can update it whenever you want. If you receive a gift, you can mark it as purchased. If your needs change, you can add new items or remove old ones. This flexibility is one of the reasons many couples like Amazon registries.
Before the wedding, review your list one more time. Check that the shipping address is correct and that the items you want are still available. After the wedding, continue updating the registry so it reflects what has been bought. This is especially helpful if guests are sending gifts later.
Amazon also offers a completion discount for eligible registries. This can be a nice bonus if you still have items left on your list. The details can vary, so it is worth reviewing the current offer in your registry settings. If you qualify, it can help you finish your list at a lower cost.
Common Mistakes to Avoid
Most registry setups go smoothly, but a few mistakes can make the process less helpful. Watch out for these common issues:
- Leaving the shipping address incorrect
- Adding too many duplicate items
- Forgetting to update the list after gifts arrive
- Using a confusing registry name
- Not checking item availability before sharing
- Skipping the final review before the wedding
Avoiding these small problems keeps your registry clean and easy to use. A quick review now and then can make a big difference.
Expert Tips for a Smooth Registry Experience
If you want your registry to work even better, a few simple habits help. First, update your list regularly. As your home setup changes, your needs may change too. Second, keep a mix of price points so guests can choose comfortably. Third, use the tracking tools so you always know what has been purchased.
It also helps to think ahead. If you plan to move or set up a new home after the wedding, focus on items that travel well or are easy to unpack. If you know you are starting a family soon, you might include practical baby and nursery items as well. Planning with your future lifestyle in mind makes the registry more useful.
Another helpful tip is to check your registry from a phone and a computer. Sometimes the layout looks different on each device. Making sure it appears clear on both can improve the guest experience. A registry that is easy to browse on mobile is especially useful since many people shop from their phones.
Quick Checklist Before You Share
Before you send your registry link, run through a short checklist:
- The registry name is clear
- The shipping address is correct
- Item quantities make sense
- Price ranges are varied
- Unwanted items are removed
- The link works on mobile and desktop
This small review takes only a few minutes, but it can prevent confusion later.
Final Thoughts on Building Your Registry
Learning how to set up an Amazon wedding registry step by step is one of the easiest parts of wedding planning. You create an account, choose your event details, add the items you want, and share the link with guests. From there, Amazon helps you track purchases and manage the list with very little effort.
The real value comes from keeping the registry organized and up to date. A thoughtful list makes gift shopping easier for your guests and more rewarding for you. It also gives you a simple way to gather the items you need for your home without extra hassle.
Take your time when choosing items, and do not feel pressured to make the list perfect right away. You can always refine it as you go. With a little planning and a few smart updates, your Amazon wedding registry can stay helpful from the first invite to the last gift.
Frequently Asked Questions
How long does it take to create an Amazon wedding registry?
It usually takes only a few minutes to set up the basics. You can add items gradually afterward, so the whole process can be as fast or as detailed as you want.
Can both partners manage the same registry?
Yes, you can share access or use one account together. Many couples choose the method that feels easiest for them, and Amazon makes it simple to edit the list.
What if a guest buys an item I already received?
You can update the registry after gifts arrive so the list stays current. This helps avoid duplicates and keeps your dashboard accurate.
Can I add items from different price ranges?
Yes, and that is a smart idea. A mix of lower-cost and higher-cost items gives guests more flexibility and makes shopping easier.
Do I need to share my registry right away?
Not necessarily. You can create it early and share it whenever you feel ready. Many couples wait until the wedding details are closer to being finalized.
What happens to the registry after the wedding?
You can keep updating it after the event if guests send gifts later. You can also adjust or close the registry when you no longer need it.