

Featured image for how to organized clean refrigerator shelves
Image source: cycookery.com
Keeping your refrigerator shelves organized and clean helps you save time, reduce food waste, and keep food safer. A simple routine of sorting, wiping, and storing items intentionally can make your fridge easier to use every day. This guide walks you through practical steps that fit busy kitchen routines.
A clean refrigerator is easier to use, easier to trust, and much less stressful when you are rushing to make dinner. If you have ever pushed past expired containers, spilled sauce, or mystery leftovers, you already know why this matters. The good news is that you do not need a complicated system to keep things under control. You just need a few repeatable habits and a simple layout that makes sense for your household.
In this guide, you will learn how to keep refrigerator shelves organized and clean without spending your whole weekend on it. We will cover a full reset, a practical sorting method, everyday storage habits, cleaning routines, and a few troubleshooting tips for common fridge problems. The goal is to help you build a system that stays tidy with less effort over time.
📑 Table of Contents
- Step One: Prepare for a Fresh Start
- Step Two: Clean the Shelves and Interior
- Step Three: Create Simple Storage Zones
- Step Four: Use Containers, Bins, and Labels
- Step Five: Build Daily and Weekly Habits
- Step Six: Keep Produce and Leftovers Under Control
- Troubleshooting Common Fridge Problems
- Make the System Work for Your Household
Step One: Prepare for a Fresh Start
Before you rearrange anything, it helps to start with a clear workspace. A complete reset gives you a better view of what you actually have, what needs to go, and what should be stored differently. This first step is about making the job easier, not making it harder.
Clear a small area on the counter
Set aside a clean towel, a trash bag, and a few minutes. If you have a lot of items, a large bowl or basket can help you move things temporarily without making a bigger mess. Having everything ready before you begin keeps you from stopping and starting over and over.
Check what needs to be tossed
As you take items out, look for expired food, containers with damaged lids, and anything that no longer smells or looks right. If you are unsure about a leftover, it is safer to discard it than to risk eating something questionable. This is also a good time to remove packaging that takes up extra space.
Group items as you go
While you are emptying the shelves, sort items into rough groups such as dairy, produce, drinks, condiments, and leftovers. This makes the next step much faster because you can return related items together instead of hunting through the fridge one by one.
Step Two: Clean the Shelves and Interior
Once the refrigerator is empty, cleaning becomes much easier. You can reach every corner, spot spills you might have missed before, and create a fresh base for your new organization system. A clean interior also helps reduce odors and sticky buildup.
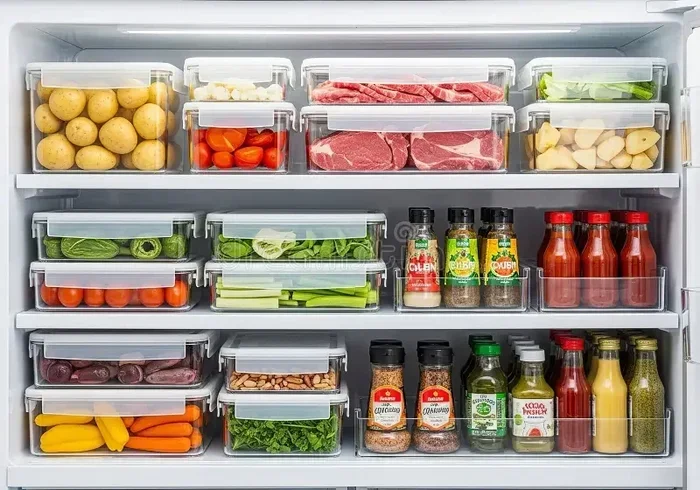
Visual guide about how to organized clean refrigerator shelves
Image source: thumbs.dreamstime.com
Wipe down shelves and drawers
Use a soft cloth or sponge with warm water and a mild dish soap. For removable shelves and bins, take them out if your refrigerator allows that, and wash them separately. Pay special attention to edges, corners, and any areas where spills tend to collect. Rinse everything well so no soap residue remains.
Clean the walls and door compartments
The inside walls, door shelves, and small compartments often collect drips and crumbs. Work from top to bottom so any drips fall lower and do not ruin the areas you already cleaned. If there are tough spots, let a damp cloth sit on them for a moment before wiping again.
Dry everything thoroughly
Moisture left behind can create sticky surfaces or encourage odors. After cleaning, wipe the interior dry with a clean towel. Let removable parts air-dry fully before putting them back in place. A dry fridge is easier to keep organized because items are less likely to slide around or cling to each other.
Step Three: Create Simple Storage Zones
Organization works best when it is easy to understand at a glance. Instead of trying to make every item look perfect, focus on creating clear zones. When similar foods live together, it becomes much easier to find what you need and notice when something is missing or running low.
Assign zones by food type
A practical layout often includes a dairy area, a produce area, a meat and protein area, a leftovers area, and a shelf for drinks or commonly used condiments. You do not need to make every zone perfect. The main goal is to give each category a predictable place.
Keep everyday items within easy reach
Place the foods you use most often where you can see them quickly. If your household reaches for milk, lunch items, or snacks several times a day, those items should not be buried in the back. Easy access reduces the chance that people leave doors open too long while searching.
Use the right spots for safety
Store raw meat on the lowest shelf or in a container where it cannot drip onto other foods. Keep ready-to-eat items separate from raw ingredients when possible. This is one of the simplest ways to make your fridge safer while also staying organized.
Step Four: Use Containers, Bins, and Labels
Containers are helpful because they reduce clutter and make it easier to move groups of items together. They also help keep smaller items from disappearing into the back of the refrigerator. The best setup is usually the one that your household will actually use.
Choose containers that fit your shelves
Pick bins and containers that match the size of your shelves and the types of food you store. Clear containers are especially useful because you can see what is inside without opening them. If a container is too tall or too deep, it may create wasted space or make items harder to reach.
Group small items together
Items like cheese sticks, yogurt tubes, sauce packets, produce bags, and snack containers often create clutter when they are scattered. A small bin can keep them together and make them easier to grab. This also makes cleanup faster because you can lift one container instead of sorting through many loose items.
Label when it helps
Labels are useful when more than one person uses the refrigerator. You can label bins, storage containers, or even specific shelf areas if that helps everyone put things back in the right place. Keep labels simple and practical rather than decorative. The goal is clarity, not perfection.
Step Five: Build Daily and Weekly Habits
A clean refrigerator stays clean when small habits are repeated often. You do not need a long routine every day. In many homes, a few minutes of attention is enough to prevent clutter from building up again.
Return items to their zones
After grocery shopping or cooking, put everything back where it belongs. This one habit prevents random piles from forming on the nearest shelf. If an item does not fit neatly, consider whether it needs a different container or a different shelf entirely.
Do a quick visual check
Once a day or every few days, take a short look inside. Check for open containers, items that need to be used soon, and anything that looks like it may leak. Catching small problems early is much easier than dealing with a bigger cleanup later.
Wipe spills as soon as they happen
If something drips, spills, or leaks, clean it right away. Fresh spills are easier to remove and less likely to leave stains or smells. A fast response also keeps sticky residue from spreading to nearby containers.
Step Six: Keep Produce and Leftovers Under Control
Produce and leftovers are two of the biggest sources of refrigerator clutter. They can also be the most useful items to manage well, because they affect both organization and food waste. A few simple habits can make a big difference here.
Store produce in ways that help it last
Some produce does better in crisper drawers, while other items need more airflow. Use the drawers for items that benefit from humidity, and keep items that bruise easily where they will not get crushed. If you notice produce spoiling quickly, adjust where and how you store it.
Use leftovers before they become forgotten
Leftovers are easiest to manage when they are stored in similar containers and placed where you can see them. If possible, keep recently made meals together so they do not get pushed behind other items. A small “eat first” area can help if your household often forgets about food that is still good.
Avoid overpacking the shelves
A refrigerator that is too full can be hard to clean and hard to use. When items are packed tightly, air does not move as well, and spills are more likely to go unnoticed. Leave a little room so you can remove and replace items without making a mess.
Troubleshooting Common Fridge Problems
Even with a good system, refrigerators can develop the same issues over and over. The trick is to notice the pattern and adjust your setup instead of just cleaning the same spot again and again.
Persistent odors
If smells keep returning, check for hidden spills, old produce, or containers that are not sealed well. Clean the affected area carefully and remove anything that may be causing the odor. If the smell continues, it may help to place an open box of baking soda in the fridge as a simple odor absorber, while also checking for the source.
Recurring spills in the same area
If one shelf or drawer always seems messy, the problem may be where certain items are stored. Try moving liquids, sauces, or juicy produce to a more protected spot. A tray or shallow bin can also help contain small drips and make cleanup easier.
Clutter that returns quickly
If the fridge gets messy again soon after cleaning, the system may be too complicated for your household. Simplify the zones, use fewer containers, or make labels clearer. A setup that is easy to maintain will usually work better than a setup that looks perfect but is hard to follow.
Items getting lost in the back
If food keeps disappearing into the back of the refrigerator, use clear bins or move older items to the front. Grouping items makes it harder for things to get overlooked. This is especially helpful for small containers and snack-size packages.
Make the System Work for Your Household
The best refrigerator setup is one that fits the way your home actually lives. A family with kids may need snack zones and easy-access bins. A person who cooks often may need more space for leftovers and ingredients. A shared household may benefit from labels and very clear storage spots. There is no single perfect arrangement, only the one that is easy enough to keep using.
If you are just starting out, keep it simple. Clean the shelves, group the food, and give each category a home. Then add containers or labels only if they make the process easier. The goal is not to create a showroom fridge. The goal is to make your refrigerator easier to use, easier to clean, and easier to keep organized from one week to the next.
When you keep your refrigerator shelves organized and clean, you spend less time searching, less time cleaning up spills, and less time throwing away food that got lost in the back. Start with one reset, build a few small habits, and let the system grow from there. A little consistency goes a long way in the kitchen.