
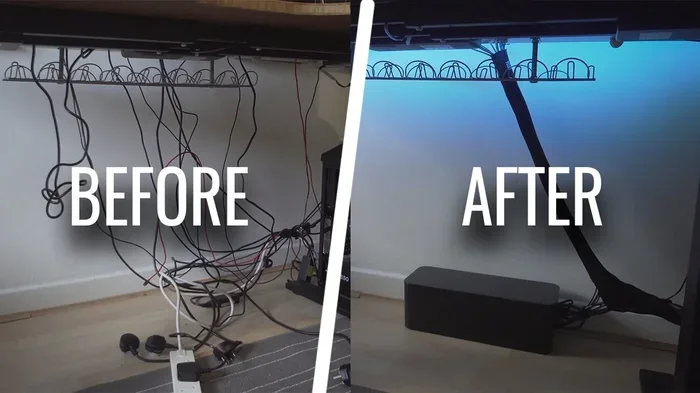
Featured image for how to TV cable management clean setup
Image source: i.ytimg.com
If you want a cleaner living space, hidden cables make a big difference. This guide shows you how to hide messy cables and cords around the TV without expensive tools. You will learn simple steps, smart products, and quick fixes that work for most TV setups.
📑 Table of Contents
- Why Hidden Cables Matter More Than You Think
- Start With a Quick Cord Audit
- Choose the Best Hiding Method for Your Setup
- Gather the Tools and Supplies You Need
- Prepare the Area Before You Hide Anything
- Bundle the Cables Neatly
- Route the Cables Along the Least Visible Path
- Use Cord Covers or Sleeves for the Most Visible Sections
- Hide the Power Strip and Adapters
- Label the Cords You Want to Keep Organized
- Test Everything After You Hide the Cables
- Troubleshooting Common Cable Hiding Problems
- Keep the Area Clean Over Time
- A Simple Checklist for a Cleaner TV Area
- Final Thoughts
Why Hidden Cables Matter More Than You Think
A TV area can look messy fast. One power cord, one HDMI cable, one soundbar wire, and a streaming device cord can turn a nice corner into a tangled pile. Even if the screen looks great, the cords underneath can make the whole room feel cluttered. That is why learning how to hide messy cables and cords around the TV cleanly can improve the way your space feels every day.
The good news is that you do not need a full renovation to fix the problem. Most TV cable problems are visual, not technical. Once you organize the wires, the room often feels calmer and more intentional. You also make dusting easier, reduce tripping hazards, and make future changes less stressful.
This guide walks you through a simple process. You will see how to plan, choose the right hiding method, install it carefully, and keep everything working afterward. The goal is a clean look that still gives you easy access when you need it.
Start With a Quick Cord Audit
Before you buy anything, take a few minutes to look at what you actually have. A clean result starts with a clear picture of the problem.
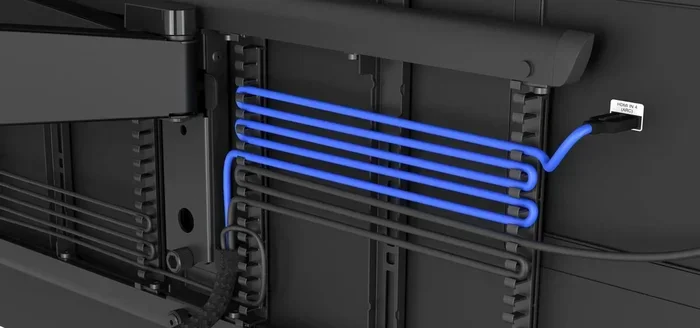
Visual guide about how to TV cable management clean setup
Image source: a.storyblok.com
Pull the TV area into view and ask a few simple questions:
- Which devices need power?
- Which cables connect to the TV?
- Which cords are temporary and which ones stay long term?
- Where do the cables currently run?
- Which wires are visible from your seating area?
This quick audit helps you avoid hiding cords you may need later. It also shows you whether the mess is mostly power cables, video cables, or both. That matters because power cords and signal cables sometimes need different handling.
If possible, unplug one cord at a time and note what it does. A small label or piece of masking tape can help during this step. You do not need a perfect system yet. You just need enough clarity to choose the best hiding method.
Choose the Best Hiding Method for Your Setup
Not every TV setup needs the same solution. A wall-mounted TV with a short drop to the floor may need a different approach than a TV sitting on a console with several devices underneath. The best method depends on how visible the cords are and how much access you want later.
Here are the most common ways to hide messy cables and cords around the TV cleanly:
Cord covers and raceways
Cord covers are useful when cables run down a wall. They create a neat channel that keeps wires organized and less noticeable. Some covers are paintable, which helps them blend into the wall color. This is a good option when you want a visible but tidy solution.
Cable sleeves
Sleeves wrap around a group of cords and turn several messy lines into one cleaner bundle. They work well when multiple cables travel together from the TV to a console or power strip. A sleeve is simple to use and does not usually require tools.
In-console or behind-furniture routing
If your TV sits on a media console, you may be able to route cords behind the furniture or through an open back panel. This works best when the console has enough space and airflow for the cables. It is a practical way to keep wires out of sight without adding wall hardware.
Cable clips and ties
Small clips and ties help when the issue is loose loops and dangling cords. They are not a full hiding solution on their own, but they make other methods work better. Use them to keep bundles tight and prevent cords from sagging into view.
Box storage for power strips
Power strips and adapters often create the bulk of the clutter. A cable management box or a simple storage container can hide the cluster while keeping plugs accessible. This is especially helpful under a TV stand or inside a shelf area.
Gather the Tools and Supplies You Need
Once you know which method fits your space, gather a few basic supplies. You may not need all of them, but having them ready makes the job smoother.
- Cable sleeves or cord covers
- Velcro cable ties or reusable clips
- A cable management box or basket, if needed
- Painter’s tape or removable labels
- A measuring tape
- Scissors or a utility knife, used carefully
- A power strip with enough outlets, if your current one is crowded
- Optional: paint that matches the wall, for paintable covers
If your plan involves mounting a raceway or attaching clips, read the product directions first. Some adhesive products work better on smooth surfaces than on textured walls. If you are unsure, test a small area before committing.
Prepare the Area Before You Hide Anything
A clean result is easier when the work area is ready. Start by clearing the space around the TV. Move small items, books, and decor that may get in the way. If you are working behind a console, vacuum or dust the back area so you are not pushing dirt onto your cords.
Next, untangle the cords as much as possible. Loose knots make measuring and bundling harder. Gently separate each cable and straighten the most visible sections. If a cord is wrapped tightly around another one, work it loose slowly so you do not stress the wire.
Then, check the length of each cord. A cable that is too short may limit where you can route it. A cable that is much too long can create extra loops and bulk. If you have excess length, plan where the extra will go before you secure it. A neat coil tucked behind furniture is usually better than a loose loop hanging in view.
Bundle the Cables Neatly
Bundling is one of the easiest ways to make cords look cleaner right away. When several cables travel the same general path, grouping them can reduce visual clutter immediately.
Use these steps for a tidy bundle:
Group cables by function
Keep power cords and data cables together only if it makes sense for your setup. For some people, grouping by destination is easier. For example, keep the TV connection cables in one bundle and the streaming device or game console cables in another.
Use soft ties, not tight knots
Velcro ties are convenient because they are reusable and gentle. Avoid cinching bundles so tightly that the cord bends sharply. A sharp bend can make the cable look worse and may stress the wire over time.
Leave a little slack
A bundle should look neat, but it should not pull tight between devices. Leave enough slack so the TV or accessory can move slightly without tugging the cord. This is especially important for wall-mounted screens and movable consoles.
Once the bundle is done, check the profile from your normal viewing angle. Sometimes a small adjustment in the path makes a big difference in how hidden the cords appear.
Route the Cables Along the Least Visible Path
The best hiding path is usually the one people notice least. That path may go down the side of a console, behind a shelf, or along a wall edge. The idea is not just to hide the cord, but to make the cord’s route feel natural and unobtrusive.
When planning the route, consider these points:
- Keep cords away from high-traffic areas if possible.
- Use corners, edges, and furniture lines as natural guides.
- Avoid routes that force cords under heavy items.
- Make sure the path does not block ventilation or access panels.
- Check whether the cord will be visible from the sofa or chair.
If the cord must cross an open space, try to keep it close to a furniture leg, shelf edge, or wall line. A sleeve or cover can help it blend in. If the cord is short, you may need to relocate the device slightly so the cable can reach without stretching.
Use Cord Covers or Sleeves for the Most Visible Sections
For the parts of the cable that remain visible, a cover or sleeve can make a big difference. These products do not remove the cord, but they make it look more organized and less distracting.
If you are using a cord cover on a wall, measure the distance first. A cover that is too long can look awkward. A cover that is too short can leave a visible gap. Cut it carefully if the product allows trimming, and follow the manufacturer’s instructions.
If you are using a sleeve, slide the cords inside and arrange them so the bundle runs straight. A sleeve works best when the cords are already roughly aligned. If the cords are very different lengths, you may want to bundle only the visible section and leave the rest separate behind the furniture.
Paintable covers can be especially helpful when you want the cord path to disappear into the background. If you choose this option, paint the cover after it is installed, if the product allows that. A color that matches the wall can make the cord channel much less noticeable.
Hide the Power Strip and Adapters
Power strips are often the biggest source of visual clutter. They collect bulky plugs, adapters, and extra cords in one place. Hiding that cluster can make the whole setup look cleaner.
One simple option is a cable management box. These boxes are designed to hold a power strip and excess cord length while still allowing airflow and access. Place the box under the TV stand or inside a nearby shelf area if the design allows it.
If you do not use a box, you can still reduce the mess by grouping the power cords and keeping the strip off the floor when possible. Mounting the strip to the back of a console or inside a cabinet can help, as long as the setup remains safe and accessible.
Keep these safety-minded habits in mind:
- Do not cover a power strip with blankets, fabric, or anything that traps heat.
- Avoid stuffing cords into a tight enclosed space with no airflow.
- Keep the power strip within reach for unplugging when needed.
- Check that plugs are fully seated and not partially pulled out.
Label the Cords You Want to Keep Organized
Hidden cables are helpful, but hidden cables that you cannot identify can become annoying later. If you ever need to replace a device, move a cord, or troubleshoot a connection, labels save time.
Use small removable labels or a piece of tape with a simple note. You can label by device, by destination, or by the port it uses. Keep the labels short. For example, “TV HDMI,” “Soundbar Power,” or “Streaming Box” may be enough.
Place the label where you can see it when the cord is accessed, but not where it ruins the clean look. On a bundle, the end of the cord is often a good spot. On a power cord, near the plug or the adapter can be helpful.
Test Everything After You Hide the Cables
Once the cords are bundled, routed, and covered, test the setup before you declare the job finished. This step is easy to skip, but it matters. A clean cable setup that accidentally pulls a plug loose is not a clean setup at all.
Turn on the TV and each connected device. Check for picture, sound, and power. If you use a soundbar, gaming console, streaming device, or external speaker, confirm that each one still works as expected. If something does not work, look for a loose connection first.
Also check the physical layout. Make sure no cord is pulling, pinching, or pressing against a sharp edge. Ensure that the TV and furniture are stable. If a cable cover or clip shifted during testing, adjust it now.
Troubleshooting Common Cable Hiding Problems
Even a simple cable project can hit a small snag. Here are a few common issues and practical ways to handle them.
The cord is too short
If a cord cannot reach the desired hiding path, do not force it. Instead, adjust the device position slightly, or choose a different route that stays within the cord’s length. A strained cord can become damaged and can also look worse than the original mess.
The wall texture makes adhesive covers fall
Some adhesive products do not grip well on textured or uneven surfaces. If that happens, try a different mounting method or use a cover designed for your wall type. In some cases, a sleeve or behind-furniture route may be a better fit than a wall-mounted raceway.
The bundle looks bulky
If the bundle is too thick, split it into smaller groups. Not every cord needs to travel together. You can also hide part of the bundle behind furniture and leave only the most visible section covered. Sometimes less bundling creates a cleaner result.
One device keeps getting disconnected
If a device seems to lose power or signal after you organize the cords, check for a partial unplug or a pinched cable. Reposition the cord so it sits comfortably and is not under tension. If the issue continues, test the device with a different cord or outlet when possible.
Keep the Area Clean Over Time
A tidy TV area is easier to maintain when you build a small habit around it. Every so often, take a quick look at the cords and the devices around them. Cords can shift, ties can loosen, and new devices can add more cables to the setup.
A few easy maintenance habits help:
- Dust the visible cord covers and the area around the TV.
- Check that ties are still secure but not overly tight.
- Remove cords for devices you no longer use.
- Re-label anything that becomes confusing after a change.
- Keep spare cords from piling up in the same area.
If you add a new device later, use the same hiding method you already set up. Consistency makes the space look cleaner than mixing several different styles of cable management.
A Simple Checklist for a Cleaner TV Area
If you want a fast recap before you start, this checklist can help:
- Identify every cord and what it powers.
- Choose a hiding method that fits your furniture and wall setup.
- Bundle cords gently and keep them accessible.
- Route the cables along the least visible path.
- Use sleeves, covers, or a box for the most visible parts.
- Label important cords.
- Test all devices after organizing.
- Recheck the setup after a few days.
Following these steps can help you hide messy cables and cords around the TV cleanly without turning the project into a big, stressful job. The best result is not just a tidier surface. It is a setup that looks calm, works well, and is easy to manage later.
Final Thoughts
A cleaner TV area usually comes from small, practical choices rather than a complicated overhaul. When you plan the route, bundle carefully, and use the right cover or box, the cords fade into the background much more easily. The room feels more organized, and the setup becomes easier to live with day to day.
If you take your time and keep access in mind, you can create a neat result that still supports your devices properly. Start with one visible problem area, fix that first, and build from there. That approach keeps the project manageable and gives you a cleaner look you can enjoy right away.