
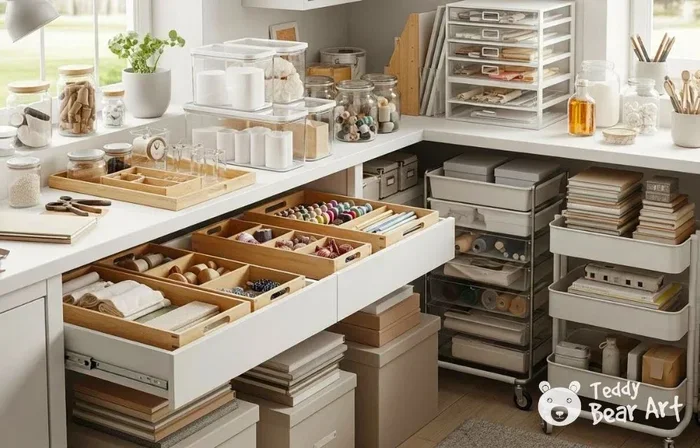
Featured image for how to small craft room organization
Image source: teddybearart.com
A small craft room can still feel spacious and functional when you plan clear zones, use vertical storage, and keep only the supplies you truly use. This guide explains how to sort, store, and maintain a tidy workspace without feeling overwhelmed. You will find practical steps that work for sewing corners, painting nooks, and mixed craft setups.
📑 Table of Contents
- Start by emptying and sorting everything
- Measure the room and map the layout
- Build simple zones for different tasks
- Use vertical space before buying more bins
- Choose storage that makes retrieval easy
- Set up a work surface that supports your projects
- Create a simple cleanup routine
- Troubleshooting common small craft room problems
- Make the room comfortable and inspiring
- Keep the system flexible as your hobbies change
- When to keep supplies outside the craft room
- Conclusion
Start by emptying and sorting everything
Before you move a single shelf or bin, take everything out of the craft space. This is the fastest way to see what you actually own. Many people are surprised by how much duplicate yarn, unused paper, or dried-out glue ends up hiding in a small room. When the space is empty, you can judge the room itself more clearly and plan around the area you really have.
Sort items into simple groups as you go. Keep like with like so you can make honest decisions. If you have three half-used packs of ribbon, one pile is enough. If you have a box of random beads, separate them by type if you plan to keep them. This step takes effort, but it saves time later because you will not be organizing clutter you do not need.
Make four clear decisions
Use four categories: keep, donate, recycle, and toss. Be practical, not sentimental, unless an item has real meaning or regular use. If you have not touched a supply in years and do not foresee using it soon, it may be time to let it go. Donated craft supplies can be a gift to schools, community groups, or other makers. Recycling and tossing broken or unusable items frees up space immediately.
Check what is actually usable
A small craft room works best when every item has a purpose. Look for dried markers, tangled cords, warped paper, or missing puzzle pieces. If something is damaged, it may be better to replace it later than to store it now. Keeping only usable supplies makes the room feel calmer and helps you find what you need without digging through clutter.
Measure the room and map the layout
Once the space is empty, measure the room carefully. Note the width, depth, and height of the walls, and pay attention to windows, doors, outlets, and any awkward corners. In a small space, these details matter more than people expect. A shelf that looks perfect in your mind may block a drawer or make the room feel cramped if it is placed without planning.
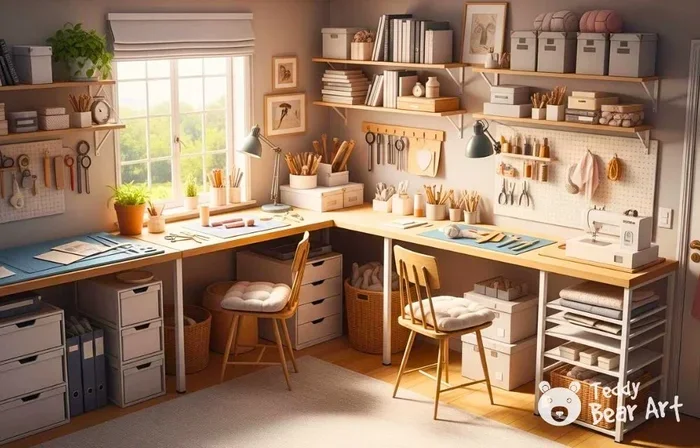
Visual guide about how to small craft room organization
Image source: teddybearart.com
After measuring, sketch a simple layout. You do not need a fancy design drawing. A rough paper plan works fine. Mark where your work surface will go, where storage can fit, and where you want to leave open space for movement. Think about how you enter the room, where you sit, and where you carry materials in and out.
Plan for your main craft first
If you mostly sew, you may want a sturdy table and easy access to fabric and thread. If you paint, you may need drying space and protection for surfaces. If you mix several crafts, the layout should support the project you do most often while still leaving room for other activities. Start with the primary use, then build around it.
Leave some breathing room
A crowded small room can become frustrating very quickly. Try not to fill every inch right away. A little open space makes the room easier to use and easier to clean. If the layout feels tight, remove one item and see whether the room functions better. Often, the best organization plan is the one that leaves you room to move.
Build simple zones for different tasks
Zones help a small craft room feel organized because each area has a job. Instead of scattering supplies everywhere, you give each type of work its own place. For example, one zone can hold cutting and measuring tools, another can hold paper or fabric, and another can hold finishing supplies such as glue, tape, or trim.
You do not need many zones. In a small room, two or three well-chosen zones may be enough. The goal is to reduce decision fatigue. When you know where a task happens, you spend less time searching and more time creating.
Keep related items together
Group supplies by activity, not just by size or container. If you often make cards, keep cardstock, stamps, ink, and envelopes near each other. If you sew, keep needles, thread, scissors, and measuring tools within the same zone. This makes projects easier to start and easier to finish.
Use portable containers for flexibility
In a small space, flexibility is helpful. A rolling bin, a caddy, or a basket can move with you from one zone to another. This is useful when one table serves multiple purposes. Portable storage also makes cleanup easier because you can carry supplies back to their home instead of leaving them out.
Use vertical space before buying more bins
When square footage is limited, look up. Vertical storage is one of the best ways to organize a craft room in a small space because it uses walls and height instead of taking up floor area. Shelves, hooks, racks, and pegboards can hold a lot without making the room feel boxed in.
Start by identifying what can safely go on the wall. Lightweight paper, ribbon spools, tools, and small bins often work well in vertical storage. Heavier items should stay low and secure. Think about how often you use each item, because the most useful things should be easiest to reach.
Install shelves that match your supplies
Open shelves are useful for baskets, bins, and clearly visible supplies. If you prefer a cleaner look, closed cabinets can hide visual clutter. The right choice depends on how often you access the items and how much dust or mess you want to contain. If you store small pieces, consider shelf bins or drawer units so things do not get lost behind each other.
Add pegboards or hooks for tools
Pegboards can be especially helpful for tools that you use often and want to keep visible. Scissors, rulers, tape dispensers, and small handles can be arranged so you can grab them quickly. Hooks can hold bags, aprons, or lightweight baskets. The key is to keep the system easy to reset, because a complicated wall setup often becomes messy if it is too hard to maintain.
Use door and wall backs
The back of a door or the side of a cabinet can be an overlooked storage spot. Over-the-door organizers, hanging pockets, or small racks can hold wrapping supplies, cleaning items, or project in progress. These areas are best for items you need sometimes but do not want on your main work surface.
Choose storage that makes retrieval easy
Good storage is not just about fitting things in. It is about getting them out again without frustration. In a small craft room, the best containers are the ones you can see into, label clearly, and carry easily. If a container is awkward to open or hard to stack, it may create more problems than it solves.
Transparent bins are useful when you want to spot supplies quickly. Opaque bins can work for items you store for longer periods or want to keep out of sight. Drawers are helpful for small tools and bits. Baskets are good for loose items that you use frequently. Try to match the container to the item, not the other way around.
Label everything you can
Labels save time and reduce the temptation to leave items out. You can use a label maker, handwritten tags, or simple stickers. Label the front of bins, drawers, and shelves so you can identify them at a glance. If you share the room with others, labels make it easier for everyone to put things back in the right place.
Group small items into categories
Small craft supplies can become messy very quickly. Bits, buttons, beads, stickers, and hardware are easier to manage when they are divided into smaller containers. Use drawer dividers, mini bins, or compartmentalized boxes. The goal is to prevent one mixed pile from turning into a jumble that is hard to sort later.
Keep the most-used items easy to reach
Think about your daily habits. If you reach for scissors, tape, or a favorite pen many times a day, those items should live in an easy spot. Items you use once a month can be stored higher up or farther back. This simple distinction makes the room feel more efficient without requiring extra storage.
Set up a work surface that supports your projects
A work surface is the center of a craft room, even when the room is small. It should be large enough for your usual projects and stable enough to handle cutting, gluing, sewing, or assembling. If you do not have room for a large table, consider a compact desk, a wall-mounted drop-leaf surface, or a rolling cart with a sturdy top.
Think about how you work, not just what furniture looks nice. Some people need space for spreading out paper or fabric. Others need a smaller surface for detailed work. A good setup supports your habits and leaves room for the tools you use most often.
Protect the surface and nearby areas
Crafting can be messy, so it helps to plan for protection. A mat, tray, or easy-to-clean cover can protect your work surface and make cleanup simpler. If you use paint, glue, or other liquids, keep a rag or towel nearby. Small habits like this prevent a room from becoming stressful between projects.
Keep a small landing spot for active projects
Many craft rooms become cluttered because finished pieces, works in progress, and supplies all compete for the same space. Give active projects a temporary home, even if it is just one tray or one shelf. That way, you can leave a project out without letting it take over the whole room.
Create a simple cleanup routine
A craft room stays organized when cleanup is easy enough to do regularly. If the system is too complicated, it gets ignored. The best routine is one you can finish in a few minutes after a project or at the end of the day. The point is not perfection. The point is to keep clutter from building up again.
Start with a small reset ritual. Put tools back in their labeled homes, empty any scraps or trash, and return active supplies to their zones. If you used a portable caddy, bring it back to its spot. This short routine makes the room ready for the next project and keeps small messes from turning into big ones.
Do a weekly quick check
Once a week, take a few minutes to look for items that drifted out of place. Check whether any bins are getting overcrowded, whether labels are still readable, and whether one zone is starting to spill into another. Small corrections are much easier than a full reorganization later.
Reset after each project
The end of a project is the best time to reset. Put leftovers away, sort scraps if you want to keep them, and clear the work surface. Even if you are tired, a quick reset helps the room stay usable. If you make it part of your process, you are less likely to leave a trail of supplies behind.
Troubleshooting common small craft room problems
Even a well-planned room can run into trouble. Small spaces often reveal the same issues again and again. The good news is that most of them have simple fixes once you understand what is causing the clutter.
Too many supplies for the space
If the room feels full no matter what you do, the real issue may be quantity. No storage system can fix an overload of items forever. Revisit your keep and donate piles, and be honest about what you use. Reducing the number of supplies is often the fastest way to create breathing room.
Not enough wall or shelf space
If walls are already busy, look for hidden spots. A rolling cart, under-table storage, or stackable bins may help. You can also separate supplies by frequency of use, keeping only the essentials in the room and storing occasional items elsewhere. Sometimes the best answer is to store less in the craft room itself.
Hard-to-find small items
If tiny supplies disappear into larger bins, downsize the container. Smaller categories and clear compartments make a big difference. You can also keep a small “miscellaneous” tray for items that do not yet have a home, then sort that tray once a week instead of letting it spread across the room.
The room gets messy again fast
If clutter returns quickly, the system may be too complicated or the cleanup step may be too long. Simplify the storage, reduce the number of categories, and make the reset routine shorter. A system you actually use is better than a perfect system you avoid.
Make the room comfortable and inspiring
Organization is not only about storage. A small craft room should also feel pleasant to spend time in. Good light, a comfortable chair, and a little personal style can make the room easier to use. When the space feels calm, you are more likely to keep it tidy.
Natural light is helpful if the room has a window, but task lighting can also make a big difference. A lamp near the work area can reduce eye strain and make detailed work easier. Add a plant, a favorite color, or a small display of finished projects if that makes the room feel more motivating. Keep decorations simple so they do not add clutter.
Keep the system flexible as your hobbies change
Craft interests often change over time. A room that works for one hobby may need to adapt later. That is why it helps to build a flexible system instead of a rigid one. Use containers that can be relabeled, shelves that can be rearranged, and storage that can move if your priorities shift.
If you start a new craft, give it a trial zone before committing to a large setup. See how often you use it and how much space it really needs. This prevents the room from filling up with supplies for hobbies you only try once. Flexibility keeps the room useful for the long term.
When to keep supplies outside the craft room
Sometimes the best organization decision is to store some items elsewhere. If the craft room is very small, it may make sense to keep bulk paper, seasonal decorations, or rarely used tools in another part of the home. The craft room can then focus on the supplies you reach for most often.
This approach works well when you have a main project area and a separate storage spot for extras. Just make sure the off-site storage is easy to access when you need it. If items are buried in a faraway closet, they may as well not exist.
Conclusion
Organizing a craft room in a small space is really about making smart choices, not cramming everything into every corner. Start by sorting honestly, measure the room, and build a layout around the crafts you actually do. Use vertical storage, clear containers, and simple labels to make retrieval easier. Then keep the room working with a short cleanup routine and a flexible system that can grow with your interests.
A small craft room can be practical, comfortable, and inspiring when it is designed around your habits. The goal is not a perfect showroom. The goal is a space where you can find your tools, start a project, and clean up without stress. With a clear plan and a few steady habits, that kind of room is absolutely possible.