
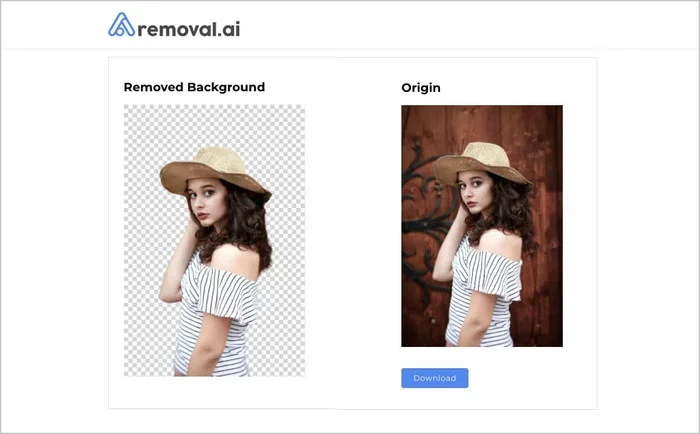
Removing unwanted backgrounds from your videos no longer requires expensive software or advanced editing skills. The best AI tool to remove background from video delivers clean, accurate results in just a few clicks. You can focus on your message while smart algorithms handle the heavy lifting. This guide breaks down the top options, compares key features, and shows you exactly how to get professional results without the learning curve.
Video creation has changed dramatically in recent years. You no longer need a green screen, a dedicated studio, or a team of editors to produce clean, polished clips. Modern software uses AI video background removal to separate your subject from the scene automatically. The process feels almost magical, but it relies on smart computer vision that tracks movement, detects edges, and fills in missing pixels. If you have ever struggled with messy backgrounds, distracting clutter, or awkward lighting, you already know why this technology matters.
The real challenge is choosing the right platform. Some tools work great for talking head videos. Others handle fast motion better. A few focus on speed, while others prioritize detail and edge quality. In this guide, we will walk through the best AI tool to remove background from video options available today, explain how they work, and show you how to get the cleanest results. You will also learn practical tips, common mistakes to avoid, and simple workflows that save time.
By the end, you will know exactly what to look for, which features matter most, and how to turn rough footage into polished content. Let us dive in.
Key Takeaways
- AI background removal saves time: Smart video segmentation cuts hours of manual rotoscoping down to minutes.
- Accuracy varies by tool: Look for motion tracking, edge refinement, and hair detail handling before you choose.
- Lighting and contrast matter: Clear subject separation works best when your subject stands out from the scene.
- Export settings impact quality: Match resolution, bitrate, and format to your platform to avoid compression artifacts.
- Free trials help you test: Run short clips through each platform to check speed, output quality, and watermark limits.
- Layering unlocks creativity: Once the background is gone, you can add custom graphics, virtual sets, or branded overlays.
- Consistency builds trust: Use the same tool and settings across projects for a uniform, professional look.
📑 Table of Contents
- What Makes the Best AI Tool To Remove Background From Video
- How AI Video Background Removal Actually Works
- Top AI Tools Compared for Background Removal
- How To Get Clean Results With AI Video Background Removal
- Common Mistakes When Using AI Background Removers
- Making the Most of Your Background-Free Video
- Final Thoughts on Choosing the Right Tool
What Makes the Best AI Tool To Remove Background From Video
Not every background remover performs the same way. The best AI tool to remove background from video usually combines accurate subject detection with smooth motion handling. You want software that follows your movement without jitter, keeps edges clean, and avoids strange halos around your hair or clothing. A strong tool also gives you control over the final look, so you can refine results instead of accepting a generic cutout.
Here are the core qualities to watch for:
- Reliable subject tracking: The tool should follow your subject frame by frame, even when you move quickly.
- Clean edge handling: Look for soft edge refinement, especially if you have frizzy hair, loose fabric, or fine details.
- Good performance on varied backgrounds: The software should handle busy scenes, low contrast, and similar colors between subject and background.
- Customizable output: You should be able to adjust transparency, blur, replacement backgrounds, or color grading.
- Fast processing: A smooth workflow matters, especially if you edit often or work with longer clips.
A tool can look impressive in a demo and still disappoint in real use. That is why it helps to test short clips before committing. Try footage with different lighting conditions, movement speeds, and background styles. If the cutout stays stable and the edges remain natural, you are likely looking at a strong option.
Why AI Video Background Removal Works So Well
Traditional editing often requires manual masking, which is slow and tedious. AI video background removal changes that by using trained models that recognize people, objects, and scenes. These models learn patterns from huge sets of visual data, so they can guess where the subject ends and the background begins. That does not mean the results are always perfect, but it does mean the heavy lifting happens automatically.
The best systems also use temporal consistency. In simple terms, they do not treat every frame like a separate photo. They consider motion and continuity, which reduces flicker and shimmering edges. This matters a lot in video because even small frame-to-frame changes can make a cutout look unstable.
Key Features to Compare Before You Choose
When you compare platforms, focus on the features that affect your daily workflow. A long feature list is not always useful if the important tools are hard to use. Instead, look for practical control and dependable results.
Here is a simple comparison of what matters most:
- Ease of use: Does the tool require complex setup, or can you remove a background in a few steps?
- Edge control: Can you refine rough areas, smooth boundaries, or restore fine details?
- Background options: Can you blur, replace, or remove the background entirely?
- Processing speed: How long does it take to process a short clip?
- Output quality: Does the final video hold up on social media, websites, or larger screens?
- Pricing structure: Is it a one-time purchase, a subscription, or a credit-based system?
If you create content regularly, consistency matters just as much as raw quality. A tool that gives good results but slows you down may not be the right fit. On the other hand, a very fast tool that creates shaky edges may cost you more time in fixes later.
How AI Video Background Removal Actually Works
It helps to understand the process so you can use the tool better. Most AI video background removal systems follow a similar flow. First, the software analyzes the clip and identifies the main subject. Then it creates a mask that separates the subject from the rest of the frame. After that, it applies the mask across the timeline while trying to keep the edges stable.
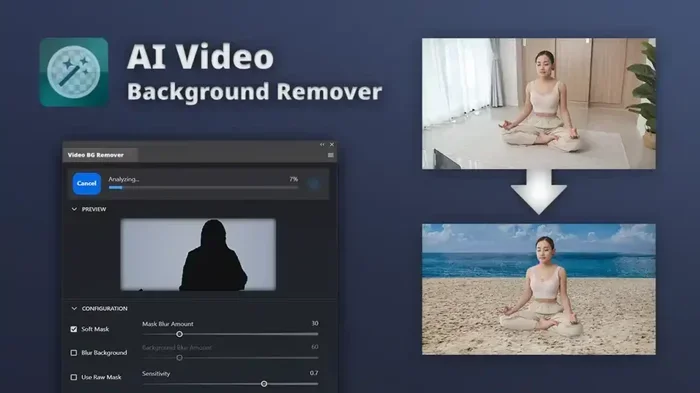
Visual guide about AI video background removal
Image source: vakago-tools.com
In many cases, the tool also refines the mask using additional passes. One pass may focus on general shape. Another may handle edges and motion. Some platforms even use a final cleanup step to reduce noise, smoothing, or halo effects. The result is a cutout that can blend into a new background or stand alone with a transparent area.
The Role of Motion Tracking and Edge Detection
Motion tracking keeps the mask aligned as the subject moves. Edge detection helps the software decide where the subject stops and the background starts. These two functions work together. If tracking is weak, the mask drifts. If edge detection is weak, the outline looks jagged or inaccurate.
This is why some tools struggle with fast movement or complex shapes. A subject turning quickly, bending, or crossing an object can confuse a basic model. Better tools handle these situations more gracefully because they use stronger temporal analysis and more refined boundary handling.
Where Results Can Still Struggle
Even strong software has limits. Low lighting, motion blur, and cluttered backgrounds can reduce accuracy. Fine details like hair, smoke, glass, or transparent objects may also create challenges. If your subject blends into the background, the tool may have a harder time separating the two.
You can often improve results by starting with better footage. A clearer subject, steadier camera movement, and stronger contrast between subject and background make the AI job easier. Think of the tool as a partner, not a miracle worker. Better input usually means better output.
Top AI Tools Compared for Background Removal
There is no single perfect answer for every creator. The best AI tool to remove background from video depends on your goals, your budget, and the type of footage you shoot. Some platforms are ideal for quick social clips. Others are better for polished presentations or branded content. Below is a practical comparison to help you narrow the field.
Quick Comparison Table
The table below highlights the kinds of strengths you may see in different tools. Use it as a starting point rather than a final verdict.
- Tool type A: Strong ease of use, fast processing, good for simple talking-head clips
- Tool type B: More advanced edge control, better for detailed subjects and motion
- Tool type C: Cloud-based workflow, convenient for teams and quick turnarounds
- Tool type D: Integrated editor with background removal plus text, overlays, and color tools
- Tool type E: Budget-friendly option with basic removal features and moderate quality
When reading reviews or testing tools, pay attention to how each one handles your specific clips. A platform that looks great for static shots may not hold up when the subject moves around. Another tool may excel at motion but offer fewer editing options. Balance matters.
Best Use Cases for Different Tools
If you mainly record short social videos, speed and simplicity may matter most. You want a tool that removes the background quickly and lets you move on to the next clip. If you produce client work or brand content, quality and control may matter more. In that case, edge refinement and background replacement options become more important.
For online courses and tutorials, a clean background can make your content feel more professional. For product demos, removing distractions helps the viewer focus on the item or action. For live-style recordings, stable tracking is essential because even small glitches can pull attention away from your message.
How to Test Tools Without Wasting Time
Start with a short representative clip. Use footage that includes some movement, a few challenging edges, and the kind of background you usually shoot against. Run the clip through each tool and compare the results side by side. Watch for flicker, edge halos, lost details, and strange artifacts.
Also test the export. Some tools look good in the preview but lose quality after rendering. Check the final file at full resolution if possible. If you plan to post on social platforms, verify how the output looks after compression. A strong tool should still look clean after the platform processes it.
How To Get Clean Results With AI Video Background Removal
Using the best AI tool to remove background from video is only part of the process. Your setup and editing choices also affect the final result. A few simple habits can make a big difference.
Shoot With Separation in Mind
Good separation makes the AI job easier. Try to keep your subject clearly distinct from the background. Distance helps. If your subject stands too close to a wall or busy backdrop, the tool may struggle to tell where one ends and the other begins. Even a few feet of space can improve the cutout.
Lighting also matters. Soft, even lighting usually works better than harsh shadows or strong backlighting. If the subject is darker than a busy background, separation becomes harder. If possible, light the subject slightly brighter than the background for clearer contrast.
Choose the Right Background for Testing
When you test a tool, use the kind of background you actually shoot with. A plain wall is easy. A crowded room is not. If your real content includes movement, furniture, patterns, or outdoor scenes, test with similar footage. That gives you a more honest picture of how the tool performs.
If you plan to replace the background later, think about the final look early. A clean cutout works best when the new background matches the lighting direction, color tone, and scale of the subject. Mismatched elements can make the video feel artificial.
Refine the Edges Before You Export
Small edge fixes often improve the whole video. If the tool allows it, soften rough outlines, clean up stray pixels, and check areas like hair or clothing edges. Even a quick pass can reduce flicker and make the subject blend more naturally into the new scene.
Do not overdo it. Too much smoothing can make the subject look waxy or blurred. Aim for a natural look rather than a perfectly sterile mask. The goal is for viewers to focus on your content, not on the cutout.
Match the Background to the Mood
Background choice affects the tone of the video. A blurred office scene can suggest professionalism. A solid color can create a clean, minimal look. A branded graphic can reinforce your identity. Pick a background that supports your message instead of competing with it.
If you use a replacement background, pay attention to scale and perspective. A subject that looks too large or too small compared with the scene can break the illusion. Simple adjustments in positioning and size often make the result feel much more believable.
Common Mistakes When Using AI Background Removers
Even with strong software, a few mistakes can ruin an otherwise good clip. Avoiding these problems is often easier than fixing them later.
- Using low-quality source footage: Blurry, grainy, or heavily compressed video makes separation harder.
- Ignoring motion blur: Fast movement can soften edges and confuse the mask.
- Over-smoothing the subject: Too much refinement can remove natural detail.
- Mismatching lighting: A new background that does not match the subject lighting can look fake.
- Forgetting to check the full timeline: A clip may look fine in one frame but glitch in another.
- Rushing the export: Wrong resolution or bitrate settings can reduce the final quality.
The good news is that most of these issues are avoidable. Start with better footage, review the full clip before exporting, and keep your adjustments balanced. A careful check takes only a few minutes and often prevents embarrassment online.
Expert Insights for Better Cutouts
One useful habit is to review your video at normal speed and at higher magnification. Normal speed shows you whether the cutout feels stable. Zooming in helps you spot edge problems, flicker, and small artifacts. If you notice issues in the same spot every few frames, the tool may need a little extra refinement there.
Another helpful tip is to keep your background replacement consistent across a project. If one video uses a blurred office and the next uses a bright gradient, the channel or brand can feel scattered. Consistency makes your content feel more intentional and polished.
It also helps to think about the viewer experience. Most people do not notice the mask itself. They notice when something looks distracting. If the subject feels natural in the scene, the edit is doing its job.
Making the Most of Your Background-Free Video
Once the background is gone, you have more creative control. You can place your subject in a new environment, add branded elements, or keep things simple with a clean blur. The best AI tool to remove background from video gives you that flexibility without turning the process into a technical headache.
Here are a few practical ways to use the result:
- Virtual presentations: Place yourself in a clean setting that matches your topic.
- Social content: Remove clutter so the focus stays on your face, product, or message.
- Training and tutorials: Create a more focused learning experience with fewer distractions.
- Marketing clips: Add branded overlays or context that supports your campaign.
- Storytelling videos: Change backgrounds to set mood or show scene changes.
You can also combine background removal with other simple edits. Color correction, audio cleanup, captions, and subtle transitions often make the final video feel much more complete. The background removal is just one part of a larger polish.
Quick Tips for a Smooth Workflow
Keep your process simple so you can repeat it easily. Use the same source settings when possible. Save your favorite background templates. Check your exports before publishing. These small habits reduce friction and help you produce better videos faster.
If you work on multiple projects, create a basic checklist. Review footage quality. Test the cutout. Refine edges. Match the background. Export and check the final file. A repeatable workflow saves time and keeps your results consistent.
Final Thoughts on Choosing the Right Tool
Finding the best AI tool to remove background from video comes down to matching the tool to your real needs. Some creators want speed. Others want precision. Many want both. The best choice is the one that handles your typical footage well, fits your workflow, and gives you results you do not need to fix constantly.
Start by testing a few options with clips that reflect your actual content. Pay attention to edge quality, motion stability, and export consistency. Use better lighting and clear subject separation when you can. Then refine the result with small adjustments instead of heavy fixes. With the right tool and a sensible process, you can create clean, professional videos without a green screen or a complicated editing setup.
Frequently Asked Questions
What is the best AI tool to remove background from video for beginners?
The best choice for beginners is usually a tool that is easy to use, processes clips quickly, and gives clean results with minimal setup. Look for a simple upload-and-edit workflow, automatic subject detection, and basic background options like blur or replacement.
Can AI video background removal work on mobile recordings?
Yes, it can work well on mobile footage if the video is clear and the subject is reasonably well lit. Mobile clips with motion blur, low light, or heavy compression may need more refinement, but many tools still handle them adequately.
Do I need a green screen to use an AI background remover?
No, you do not need a green screen. AI background removal is designed to separate the subject from normal backgrounds. A green screen can still help in some workflows, but it is not required for most modern tools.
Why does the subject edge look shaky in some videos?
Shaky edges usually happen when the subject moves quickly, the lighting is low, or the tool struggles with frame-to-frame consistency. Better footage, slower movement, and stronger contrast often reduce this problem.
Will background removal reduce video quality?
It can if the tool uses aggressive processing or if the export settings are poor. High-quality source footage and careful export settings usually preserve a clean, sharp result.
Can I replace the background with my own image or video?
Many tools allow that, either directly or through an editor. Once the background is removed, you can layer in a new image, video, blur, color backdrop, or branded graphic to match your project.