
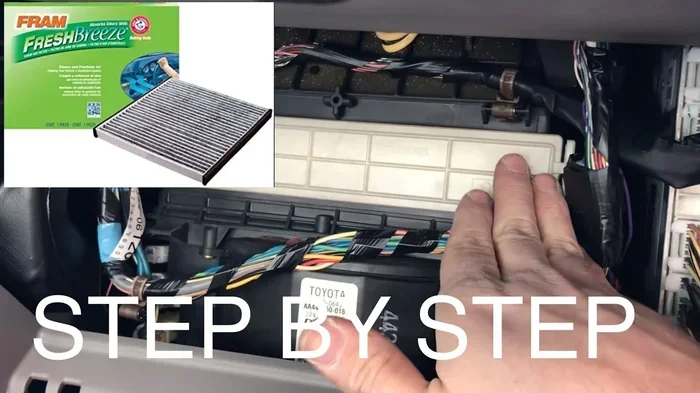
Replacing your cabin air filter is one of the simplest maintenance tasks you can do at home. This guide shows you exactly how to change cabin air filter in Toyota Camry without special tools or professional help. You will learn the right steps, common mistakes to avoid, and why this small part matters so much for your comfort and health.
Key Takeaways
- Easy DIY task: You can replace the filter in under fifteen minutes with no special tools.
- Improved air quality: A fresh filter removes dust, pollen, and odors from your cabin air.
- Cost savings: Doing it yourself avoids dealership labor fees and keeps repair costs low.
- Right filter matters: Always use the correct size and type for your specific Camry model year.
- Check regularly: Inspect your filter every six months or during routine oil changes.
- Simple access: Most Camry models store the filter behind the glove box for easy reach.
- Better HVAC performance: A clean filter helps your heating and cooling system work more efficiently.
📑 Table of Contents
Why Changing Your Cabin Air Filter Matters
Your car works hard to keep you comfortable on every drive. The heating and cooling system pulls in outside air and pushes it through the vents. That air carries dust, pollen, road debris, and even tiny pollutants. The cabin air filter catches those particles before they reach your lungs.
Over time, the filter fills up. A clogged filter restricts airflow and makes your system work harder. You might notice weak airflow from the vents or a musty smell when you turn on the fan. Replacing the filter restores fresh airflow and keeps your cabin feeling clean.
Many drivers overlook this small part. They focus on oil changes, tire rotations, and brake checks. Yet the cabin filter plays a big role in daily comfort. A fresh filter also helps reduce allergens for sensitive passengers. If you drive with kids, pets, or anyone with seasonal allergies, this simple swap makes a real difference.
You do not need a mechanic for this job. The process is straightforward and quick. Learning how to change cabin air filter in Toyota Camry gives you more control over your car care routine. It also helps you avoid unnecessary service visits and keeps more money in your pocket.
What Does a Cabin Air Filter Do?
The filter sits in the air intake path before air reaches the evaporator and blower motor. It traps particles as air flows inward. Most filters use a pleated paper or woven material designed to catch fine debris. Some upgraded versions include activated carbon to reduce odors and exhaust fumes.
A clean filter supports steady airflow. That means your climate control system can heat or cool the cabin faster. It also reduces strain on the blower motor. When the filter stays clean, the whole system runs smoother and quieter.
Signs Your Filter Needs Replacement
You do not always need a schedule to know when it is time. Your car often gives you clear clues. Watch for these common signs:
- Weak airflow from the dashboard vents even at high fan settings
- Unpleasant odors that appear when you turn on the climate control
- Increased dust settling on the dashboard and interior surfaces
- Higher noise levels from the blower motor working harder
- Reduced cooling or heating performance on hot or cold days
If you notice one or more of these issues, inspect the filter soon. A quick check can save you from bigger discomfort later.
How Often Should You Replace the Cabin Air Filter?
Most Toyota owners check the cabin filter once a year. Many replace it every twelve to fifteen months. Your exact schedule depends on where you drive and how much you use the climate system.
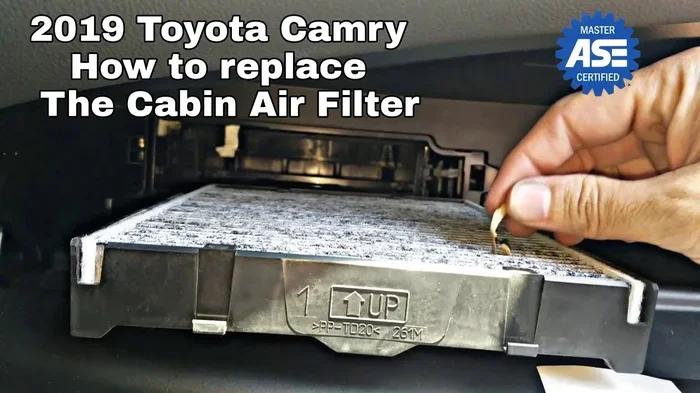
Visual guide about Toyota Camry cabin air filter
Image source: i.ytimg.com
City driving with heavy traffic and construction dust can clog filters faster. Rural roads with pollen, dirt, and crop debris also shorten filter life. If you park outside near trees, leaves and seeds may find their way into the intake area. In those cases, a six-month check makes sense.
Seasons matter too. Spring brings pollen that fills filters quickly. Fall brings dry leaves and outdoor debris. If you run the fan often, the filter works harder and fills sooner. A good rule is to inspect it during your regular maintenance routine.
You can also pair this task with other simple checks. For example, when you review tire pressure or top off washer fluid, take a quick look at the filter access area. If you want a broader view of routine care, you may also find it helpful to read about how do you reset maintenance light on 2026 Toyota Camry so you can keep your service reminders accurate after DIY work.
Factors That Shorten Filter Life
Several conditions can make your filter wear out faster. Knowing these helps you plan better.
- Heavy pollen seasons in your area
- Frequent stop-and-go traffic with lots of exhaust and dust
- Dirt roads or construction zones on your daily route
- Pets in the car that shed hair and dander
- Open windows often in dusty environments
- High fan usage during hot summers or cold winters
If any of these apply to you, check the filter more often. A quick inspection takes only a few minutes.
Tools and Parts You Need
One of the best parts about this job is the simple tool list. You usually do not need a mechanic kit. Most of the time, your hands and a little patience are enough.
Here is what you should gather before you start:
- New cabin air filter made for your Camry model year
- Clean cloth or microfiber towel to wipe the filter housing
- Flashlight if the area under the glove box is dim
- Soft brush or small vacuum to remove loose debris
- Gloves if you prefer a cleaner grip
Before buying a filter, check your owner manual or the old filter part number. Toyota Camry filters come in different sizes and shapes depending on the generation. Using the correct fit matters for proper airflow and sealing.
Choosing the Right Filter
Not all filters perform the same. A standard pleated filter does a solid job for most drivers. If you care about odors, a carbon-impregnated filter can help reduce smells from traffic and road fumes. Some drivers also prefer higher-efficiency materials for better particle capture.
When comparing options, look at these points:
- Fitment for your exact Camry year and trim
- Filtration quality based on your driving environment
- Odor control if you want extra carbon filtration
- Ease of installation since some filters have directional arrows
- Price versus value because a better filter can last longer
A quality filter is a small investment. It protects your comfort and helps your climate system stay efficient.
Step-by-Step Guide to Replace the Cabin Air Filter
This is the core of the job. The process is simple, but a careful approach helps you avoid mistakes. Follow these steps closely and you will finish quickly.
Step 1: Prepare the Vehicle
Start with the car parked on level ground. Turn off the engine and remove the key or take out the key fob. If the fan was running, wait a moment before opening anything. You want the system calm and the air flow stopped.
Open the passenger door and clear out any items blocking the glove box area. A little preparation makes the job smoother and prevents accidental bumps.
Step 2: Access the Filter Compartment
In most Camry models, the cabin filter sits behind the glove box. The glove box usually has stops or dampers that limit how far it opens. You may need to gently lower the glove box to reach the cover.
Some models use a removable cover. Others use clips or small screws. If you see screws, keep them safe in a small dish so they do not roll away. If the glove box has a damper arm, handle it carefully so it does not swing or snap.
Once the cover is open, you should see the filter slot. It is usually a rectangular housing with a slide or lift mechanism.
Step 3: Remove the Old Filter
Note the direction of the old filter before pulling it out. Many filters have an arrow that shows airflow direction. That arrow matters when you install the new one.
Slide or lift the old filter out slowly. Expect some dust and debris to fall. That is normal. Use your cloth or brush to catch loose particles. If the filter looks dark, clogged, or covered in leaves, you will immediately see why replacement matters.
Take a moment to inspect the housing too. Look for leaves, twigs, or packed dust. A clean housing helps the new filter work better from day one.
Step 4: Install the New Filter
Check the airflow arrow on the new filter. Match it to the direction marked in the housing or the direction the old filter was facing. This step is important because a reversed filter can reduce performance.
Slide the new filter into place gently. Make sure it sits flat and fits the edges cleanly. It should not feel forced. If the fit looks tight, double-check the size and orientation before pushing further.
Once the filter is seated, replace the cover. Reattach any clips, screws, or glove box parts you removed. Move the glove box back into its normal position and make sure it opens and closes smoothly.
Step 5: Test the System
Start the car and turn on the fan. Listen for normal airflow and check that the vents blow strongly. Smell the air if you previously had a stale odor. A fresh filter often makes the cabin feel noticeably cleaner right away.
If the airflow still feels weak, recheck the filter direction and seating. Also look for any packaging material left in the housing. A quick second check usually solves the issue.
Common Mistakes to Avoid
This job is simple, but a few mistakes can cause frustration. Avoiding them saves time and keeps the repair clean.
One common mistake is installing the filter backward. The airflow arrow exists for a reason. If the filter faces the wrong way, air may not pass through properly. Always confirm the arrow before closing the cover.
Another mistake is leaving debris in the housing. A dirty cavity can send dust straight to the new filter. Wipe the area before installation. A quick clean makes a big difference.
Some people force the glove box or cover back into place. That can crack plastic clips or damage the damper. Work gently and make sure everything aligns before snapping parts together.
Others forget to check the filter size. A filter that is slightly off can leave gaps around the edges. Air may bypass the filter instead of passing through it. Always use the correct part for your Camry.
Quick Tips for a Smooth Swap
- Take a photo of the old filter direction before removing it
- Keep screws and clips in a small container
- Use a flashlight if the area is hard to see
- Clean the housing before installing the new filter
- Double-check the arrow before closing the cover
- Test the fan right after installation
When to Seek Professional Help
Most of the time, this is a perfect DIY task. Still, there are situations where a professional may be the better choice. If the glove box area looks damaged, or if clips and dampers seem broken, a technician can help. A damaged housing may affect filter fit and airflow.
If you cannot locate the filter compartment, or if your Camry has an unusual layout, a service advisor can point you in the right direction. Some owners also prefer professional help when they are short on time or want a full inspection at the same visit.
If you are already planning other maintenance, you might combine tasks. For example, if you are checking fluid levels or scheduling routine service, ask about the cabin filter while you are there. That way, you can handle several small items in one trip.
If you want to keep your car care simple and consistent, it helps to stay organized. You can also learn more about related Toyota maintenance topics such as how much is oil change at Toyota dealership so you can compare DIY savings with service costs and plan your budget wisely.
Expert Insights on Cabin Filter Care
Experienced owners and technicians often say the same thing: small maintenance items add up. A clean cabin filter does not just improve smell. It supports airflow, comfort, and system efficiency. It also keeps the interior environment healthier for daily driving.
Another helpful insight is consistency. Do not wait until the odor becomes strong or the airflow drops a lot. Check the filter before it gets that far. A scheduled inspection is easier than troubleshooting a clogged system later.
A third insight is quality. A cheap filter that fits poorly can cause more problems than it solves. Choose a filter that matches your vehicle and your driving conditions. If you deal with heavy dust or odors, a better filter may be worth it.
Final Thoughts on Keeping Your Camry Fresh
Learning how to change cabin air filter in Toyota Camry is one of the easiest ways to improve your daily drive. The job is quick, the tools are simple, and the benefits show up right away. Better airflow, cleaner air, and a more pleasant cabin make this a small task with a big payoff.
Make it part of your routine. Check the filter at least once a year, and inspect it sooner if you drive in dusty or pollen-heavy conditions. Use the correct filter, follow the airflow direction, and clean the housing before installation. Those simple habits keep your climate system working well and your cabin feeling fresh.
If you stay proactive, you will notice the difference over time. Your vents will blow stronger, odors will stay away longer, and your car will feel more comfortable every time you climb inside. That is the real value of a clean cabin air filter.
Frequently Asked Questions
How long does it take to change the cabin air filter in a Toyota Camry?
It usually takes about ten to fifteen minutes once you have the new filter and clear access to the glove box area. The exact time depends on your comfort level and how easily the cover opens.
Where is the cabin air filter located in a Toyota Camry?
In most Camry models, the cabin air filter sits behind the glove box. You typically access it by lowering or removing the glove box cover and then opening the filter housing.
What happens if I install the cabin air filter backward?
If the filter goes in backward, airflow may be reduced and the filter may not trap particles as intended. Always match the airflow arrow on the filter to the direction marked in the housing.
Can I use any cabin air filter for my Toyota Camry?
You should use a filter made for your specific Camry model year and trim. The size and shape can vary, so checking the part number or owner manual helps ensure a proper fit.
How do I know when my cabin air filter needs replacing?
Common signs include weak vent airflow, stale or musty odors, more dust inside the car, and reduced heating or cooling performance. If you notice these issues, inspect the filter soon.
Is it worth upgrading to a carbon cabin air filter?
A carbon filter can help reduce odors and exhaust smells, which is useful if you drive in heavy traffic or want a fresher cabin. A standard filter still works well for basic dust and pollen control.