
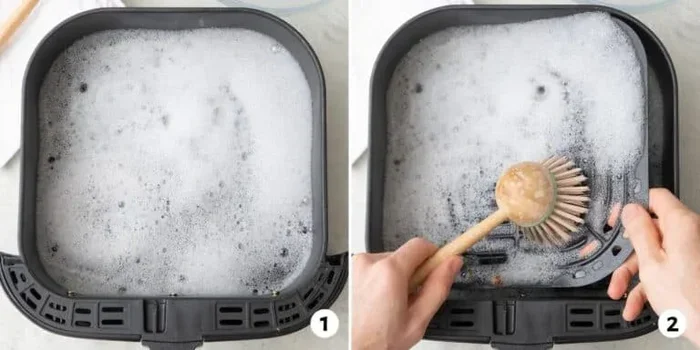
Featured image for how to clean air fryer basket
Image source: feelgoodfoodie.net
A clean air fryer cooks more evenly, smells fresher, and lasts longer. In this guide, you will learn how to clean an air fryer properly without damaging the basket, heating element, or nonstick coating. Follow these simple steps to remove grease, eliminate odors, and keep every meal tasting its best.
Cleaning your air fryer does not have to be a chore. In fact, once you know how to clean an air fryer properly, it becomes a quick habit that protects your appliance and improves every meal. A dirty air fryer can leave behind smoke, odd smells, and leftover grease that affects the flavor of your next batch. A clean one works better, looks better, and usually lasts longer.
This guide will walk you through the entire process from start to finish. You will learn how to handle the basket, tray, interior, and exterior without scratching the surface or forcing water where it does not belong. You will also find simple ways to deal with stuck-on food, greasy residue, and lingering odors. Whether you use your air fryer every day or just once in a while, these steps will help you keep it in great shape.
Before you begin, keep one important rule in mind: safety comes first. An air fryer contains electrical parts, hot surfaces, and sometimes delicate coatings. That means you should never rush the cleaning process while the unit is still hot or plugged in. Once you get into a steady routine, though, cleaning becomes easy enough that you may actually look forward to it.
Key Takeaways
- Point 1: Always unplug and let the air fryer cool completely before cleaning to avoid burns and electrical risk.
- Point 2: Remove the basket and tray first, then wash them with warm water, mild dish soap, and a soft sponge.
- Point 3: Wipe the interior and heating area gently with a damp cloth, since harsh scrubbing can damage the coating.
- Point 4: Soak stuck-on grease in warm soapy water, then use baking soda paste for stubborn spots.
- Point 5: Dry every part thoroughly before reassembling, because trapped moisture can cause smells and buildup.
- Point 6: Clean after each use for easier maintenance, and do a deeper clean once a week if you cook often.
- Point 7: Avoid steel wool, abrasive pads, and harsh cleaners unless the manufacturer specifically says they are safe.
Quick Answers to Common Questions
Can I wash the air fryer basket in the dishwasher?
Sometimes yes, but only if the manufacturer says the basket and tray are dishwasher-safe. When in doubt, handwashing with warm water and mild soap is the safer choice for the coating.
What is the safest way to remove stuck-on food?
Soak the part in warm soapy water first, then use a soft sponge or plastic scraper to lift the residue gently. Avoid metal tools and harsh scrubbing, which can damage the surface.
Do I need special cleaners to clean an air fryer?
Usually not. Warm water, mild dish soap, and baking soda are enough for most cleaning jobs. Strong chemical cleaners are often unnecessary and may leave residue behind.
How do I stop my air fryer from smelling between uses?
Clean the basket, tray, and interior regularly, and make sure every part is fully dry before storing. Leaving the appliance open to air out can also help reduce lingering odors.
Can I clean the heating element with water?
Only in a very careful way and only if the manufacturer allows it. In most cases, it is better to wipe around the heating area with a dry or slightly damp cloth instead of pouring water on it.
📑 Table of Contents
- What You Will Need Before You Start
- Step 1: Unplug the Air Fryer and Let It Cool
- Step 2: Remove the Basket, Tray, and Other Removable Parts
- Step 3: Wash the Basket and Tray
- Step 4: Clean the Interior of the Air Fryer
- Step 5: Wipe the Heating Area and Vents Carefully
- Step 6: Clean the Exterior and Control Panel
- Step 7: Dry Everything Thoroughly
- Step 8: Reassemble and Do a Quick Check
- How to Handle Stubborn Stains and Burnt-On Food
- How Often Should You Clean Your Air Fryer?
- Common Mistakes to Avoid
- Troubleshooting: What If Your Air Fryer Still Smells or Looks Dirty?
- Tips for Easier Cleaning in the Future
- A Simple Routine You Can Follow Every Time
- Final Thoughts
What You Will Need Before You Start
Gathering the right supplies makes the whole job smoother. You do not need fancy products or special tools. In most cases, simple kitchen basics are enough. Having everything ready before you start also helps you avoid scratching the surface while searching for a sponge or cloth.
Here is a practical list of items that work well for most air fryers:
- Warm water for loosening grease and softening food residue
- Mild dish soap that cuts through oil without leaving harsh residue
- Non-abrasive sponge or soft cloth for gentle cleaning
- Soft-bristled brush for corners, vents, and small crevices
- Baking soda for tough stains and stubborn buildup
- Microfiber towel or dry cloth for drying parts and wiping the exterior
- Plastic scraper or old soft spatula for lifting stuck bits carefully
If your air fryer has a dishwasher-safe basket and tray, you may be able to use the dishwasher for those removable parts. Even then, it is still smart to check the manual first. Not every model is built the same, and some coatings last longer when washed by hand.
Step 1: Unplug the Air Fryer and Let It Cool
The first step is simple, but it matters a lot. Always unplug the appliance before cleaning. This reduces the risk of shock and prevents accidental activation while you are handling the parts. It also gives you a chance to work safely without worrying about buttons, settings, or heating cycles.
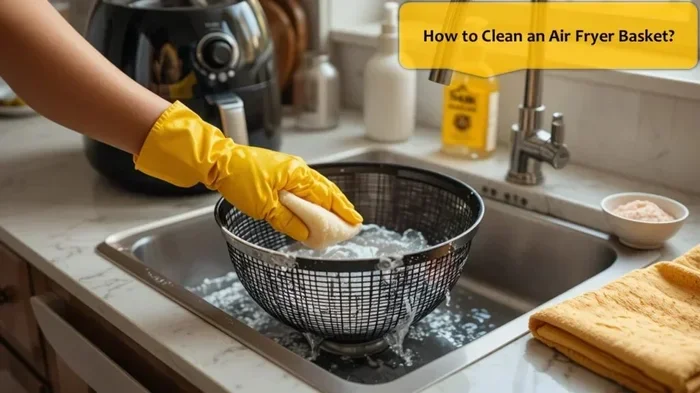
Visual guide about how to clean air fryer basket
Image source: offsitekitchen.net
Next, let the air fryer cool down completely. If you just finished cooking, the basket, tray, and interior can stay hot for a while. Cleaning too soon can lead to burns or warped parts if the material is sensitive to sudden temperature changes. It can also make cleaning harder because hot grease can smear instead of lifting away.
A good habit is to start the cooling process as soon as you are done cooking. Empty excess oil, remove the basket if it is safe to do so, and leave the unit in a stable place until it is cool to the touch. Once the exterior and interior feel room temperature, you are ready to clean.
Why cooling matters
Cooling is not just about safety. It also helps you clean more effectively. When grease is extremely hot, it can spread across the surface and settle into tiny crevices. Once it cools, it often becomes easier to remove with warm water and a gentle sponge. That means less scrubbing and less frustration later.
Step 2: Remove the Basket, Tray, and Other Removable Parts
Most air fryers are designed with parts that come out for washing. The basket and tray are the most common pieces, but some models also include racks, skewers, or other accessories. Remove everything that is meant to be taken out. This makes it easier to clean each piece thoroughly and prevents you from missing hidden grease.
Set the removable parts aside on a clean surface. If they are covered in food or oil, you may want to place them near the sink or in a shallow tray so drips do not spread across your counter. Try not to stack heavy items on top of delicate pieces, especially if there is food residue that could scratch the coating.
Before washing, check for leftover crumbs, grease pools, or bits of food stuck near the edges. This is a good time to shake out loose debris so you are not washing a pile of crumbs into the sink or around the appliance.
Handling parts carefully
Even if a basket looks sturdy, treat it gently. Nonstick surfaces can be damaged by rough handling, sharp tools, or aggressive scrubbing. If food is stuck, do not pry at it with a knife or metal utensil. Instead, use a plastic scraper or a soft spatula to lift the edge carefully. If needed, soak the part first so the residue loosens on its own.
Step 3: Wash the Basket and Tray
This is where most of the grease and food residue will come out. For regular cleaning, warm water and mild dish soap are usually enough. Fill a sink or basin with warm soapy water, then submerge the basket and tray if they are fully removable and safe to wash that way. Let them sit for a few minutes so the grease softens.
After soaking, use a non-abrasive sponge or soft cloth to clean the surfaces. Work from the top down and pay attention to corners, ridges, and any area where food tends to cling. Rinse thoroughly so no soap remains. Leftover soap can affect the taste of future meals or leave a film on the surface.
If the pieces are labeled dishwasher-safe, you can place them in the dishwasher instead. That is often convenient, but handwashing may still be gentler for some coatings over time. If you are unsure, the safest choice is to follow the manufacturer’s instructions.
Dealing with sticky grease
Some foods, especially those with oil, cheese, or sugary sauces, can leave a stubborn film. When soap and water are not enough, make a simple paste of baking soda and a little water. Apply it to the greasy area and let it sit briefly before wiping it away. Baking soda is useful because it can help lift residue without harsh scrubbing.
For extra-sticky spots, you can also repeat the soak. Sometimes the key is patience rather than force. Let warm soapy water do the work, then wipe again. If you rush and scrub too hard, you may wear down the surface instead of cleaning it.
Step 4: Clean the Interior of the Air Fryer
Once the removable parts are out, turn your attention to the inside of the appliance. This area usually does not need heavy scrubbing. In many cases, a damp cloth or sponge is enough. Wipe away crumbs, oil splatter, and any loose residue that has collected on the walls or floor of the cooking chamber.
Use gentle pressure. The interior may have a coating that can be scratched by rough pads or aggressive cleaning. If you notice buildup in corners or near the heating area, use a soft-bristled brush or a cloth wrapped around your finger to reach those spots carefully. The goal is to remove dirt without damaging the surface.
Avoid pouring water directly into the air fryer. Even if the interior looks like it could handle a rinse, the appliance contains electrical components that should stay dry. Instead, dampen your cloth or sponge, wring it out well, and wipe only the areas that need cleaning.
What to avoid inside the unit
Do not use steel wool, scouring pads, or abrasive cleaners unless the manufacturer specifically says they are safe. These materials can leave scratches that make future cleaning harder and may shorten the life of the coating. Also avoid strong chemical cleaners that leave behind fumes or residue. A mild approach is usually safer and more effective for routine cleaning.
Step 5: Wipe the Heating Area and Vents Carefully
The heating area and vents deserve special attention because they affect airflow and performance. Dust, grease, and crumbs can collect there over time. If those areas become too dirty, the air fryer may not circulate heat as efficiently. That is why a careful wipe is part of learning how to clean an air fryer properly.
Use a dry or slightly damp cloth to remove loose debris from the vents and surrounding areas. If the manufacturer’s instructions allow it, a soft brush can help clear dust from narrow spaces. Be gentle and avoid pushing debris deeper into the appliance. You are trying to clear the surface, not force dirt inward.
If you see grease near the heating area, wipe it carefully without disturbing any parts that should not get wet. This is one of those places where less is more. A light cleaning is usually better than a thorough soaking.
Keeping airflow clear
Airflow matters in an air fryer because the appliance depends on moving hot air around the food. If vents are blocked by grease or crumbs, cooking can become uneven. You do not need to disassemble the unit to maintain good airflow. Regular wiping and occasional deeper cleaning are usually enough to keep things working well.
Step 6: Clean the Exterior and Control Panel
The outside of the air fryer gets dirty too. Fingerprints, kitchen grease, and splatter can build up on the surface, especially around the handle and buttons. A clean exterior makes the appliance easier to use and keeps your kitchen looking tidy.
Wipe the outside with a soft damp cloth. If the surface is greasy, add a small amount of mild soap to the cloth, not directly to the appliance. Then wipe again and dry with a clean towel. For the control panel, use light pressure and avoid letting moisture drip into cracks or openings.
If your model has a display or sensitive controls, be extra careful around those areas. A dry microfiber cloth can often remove dust and fingerprints without any cleaning solution at all. That is often the safest option for glossy or electronic surfaces.
A polished finish
Once the exterior is clean, give it a final wipe with a dry cloth. This prevents streaks and helps the surface stay dry before you put the parts back together. A quick exterior clean also gives you a chance to inspect the appliance for anything unusual, such as damaged cords, loose parts, or buildup in odd places.
Step 7: Dry Everything Thoroughly
Drying is one of the most important steps, even though it is easy to overlook. Moisture left on the basket, tray, interior, or exterior can lead to odors, water spots, or premature wear. It can also make the next cooking session less pleasant if water drips into the appliance or onto your food.
Start by drying the removable parts with a clean towel. Then let them air-dry fully before reassembling. If you are in a hurry, place them on a drying rack or clean towel and give them enough time to lose any remaining moisture. Do not put damp parts back into the air fryer.
For the interior and exterior, use a dry cloth to remove as much moisture as possible. Pay attention to corners, seams, and any place where water might collect. The goal is a completely dry appliance before you plug it back in or store it away.
Why drying matters
A dry air fryer is a healthier air fryer. Trapped moisture can encourage smells and make grease cling more easily the next time you cook. It can also create a sticky feeling on surfaces that should be smooth. Taking a few extra minutes to dry everything well helps your cleaning efforts last longer.
Step 8: Reassemble and Do a Quick Check
Once every part is clean and dry, put the basket, tray, and accessories back in place. Make sure each piece sits correctly and that nothing is twisted, misaligned, or still damp. A quick check now can save you from problems later.
Before you cook again, take a moment to smell the interior. If there is still a strong odor, you may want to wipe the interior again or leave the appliance open for a while to air out. A faint smell can sometimes remain after cooking strong foods, but a persistent odor may mean another cleaning is needed.
You can also run the air fryer empty for a short time if you want to make sure everything is dry and working normally. This is optional, but it can be helpful after a deep clean or after cleaning parts that held a lot of moisture.
How to Handle Stubborn Stains and Burnt-On Food
Not every mess comes off with a quick wipe. Sometimes food bakes onto the surface, especially if it is sugary, oily, or left in the fryer too long. When that happens, stay calm and work gradually. Stronger cleaning does not always mean better cleaning.
Start with a longer soak in warm soapy water. If the basket or tray can be submerged safely, this often loosens the worst of the residue. After soaking, wipe again and see what remains. For stubborn spots, a baking soda paste can help lift the stain without harsh scrubbing.
If food is stuck in a thin layer, a plastic scraper or soft spatula may help nudge it free. Use gentle pressure and work from the edge of the residue rather than attacking the center. The idea is to lift the buildup, not gouge the surface.
When a mess keeps coming back
If the same area keeps getting dirty, look at how food is placed in the basket and whether oil or sauces are dripping into hard-to-clean spots. Sometimes the cleaning problem is really a cooking habit problem. Using a little less oil, avoiding overfilled baskets, and checking the food during cooking can reduce future buildup.
How Often Should You Clean Your Air Fryer?
The right cleaning schedule depends on how often you use the appliance and what you cook. If you use it frequently, a quick clean after each session is usually best. That does not mean a full deep clean every time. It simply means removing crumbs, wiping grease, and washing the basket and tray before buildup turns into a bigger problem.
For lighter use, a regular clean after each cooking session still helps, but you may only need a deeper clean once in a while. If you notice smoke, smells, or visible residue, clean sooner rather than later. Waiting too long can make the next cleanup much harder.
Think of it this way: small, frequent cleaning is easier than occasional heavy scrubbing. A few minutes after each use can save you a lot of time later.
Common Mistakes to Avoid
Even a simple cleaning routine can go wrong if a few common mistakes slip in. Avoiding these problems will help your air fryer last longer and stay easier to clean.
- Cleaning while the unit is hot: This can be unsafe and may make grease harder to remove.
- Using abrasive pads: These can scratch coatings and make future cleaning more difficult.
- Soaking parts that should not be soaked: Always check which pieces are safe for water before submerging them.
- Leaving moisture behind: Drying is essential, especially before reassembling or storing the appliance.
- Using harsh chemicals: Strong cleaners can leave residue and may not be necessary for routine cleaning.
- Forcing stuck food off: Gentle soaking and lifting work better than aggressive scraping.
Troubleshooting: What If Your Air Fryer Still Smells or Looks Dirty?
Sometimes the first cleaning does not solve everything. If an odor lingers, try cleaning the interior again and making sure all parts are fully dry. Strong-smelling foods can leave traces that take more than one pass to remove. Leaving the appliance open in a dry, airy space can also help.
If grease keeps appearing in the same area, check whether food is dripping there during cooking. You may need to adjust portion sizes, reduce oil, or clean that spot more often. Repeated buildup usually points to a pattern rather than a one-time mess.
If you see residue that will not come off with gentle cleaning, stop and reassess before scrubbing harder. Hard scrubbing can do more harm than good. In some cases, the issue may be a coating that has worn down over time, which means it is worth checking the appliance for wear or damage.
Tips for Easier Cleaning in the Future
The best cleaning routine is the one that prevents big messes from happening in the first place. A few small habits can make a big difference over time.
- Shake out crumbs after use: This keeps debris from baking onto the surface.
- Wipe while the basket is still warm, not hot: If safe to do so, a quick wipe can prevent grease from hardening.
- Use less messy foods when possible: Sauces and sugary coatings tend to create more cleanup.
- Clean the basket regularly: Do not wait until the residue is thick.
- Keep a soft cloth nearby: Easy access makes quick cleanup more likely.
These habits do not take much time, but they make how to clean an air fryer properly much easier to practice consistently.
A Simple Routine You Can Follow Every Time
If you want a straightforward routine, use this order: unplug, cool, remove parts, wash removable pieces, wipe the interior, clean the exterior, dry everything, and reassemble. That is the core of the process. Once you repeat it a few times, it becomes quick and familiar.
You do not need to make the routine complicated. The goal is consistency. A simple method done regularly works better than an occasional deep clean that feels overwhelming.
Final Thoughts
Learning how to clean an air fryer properly is one of the easiest ways to protect your appliance and keep your food tasting great. With a little patience, gentle cleaning tools, and a regular routine, you can keep grease, crumbs, and odors under control without much effort. The process is simple, but the payoff is real: better performance, a cleaner kitchen, and less stress every time you cook.
Start with the basics, stay consistent, and adjust your routine based on how often you use the air fryer. If you treat the basket, tray, and interior with care, your appliance will be much easier to maintain over time. A clean air fryer is not just nicer to use. It also helps you get the best results from every meal.