
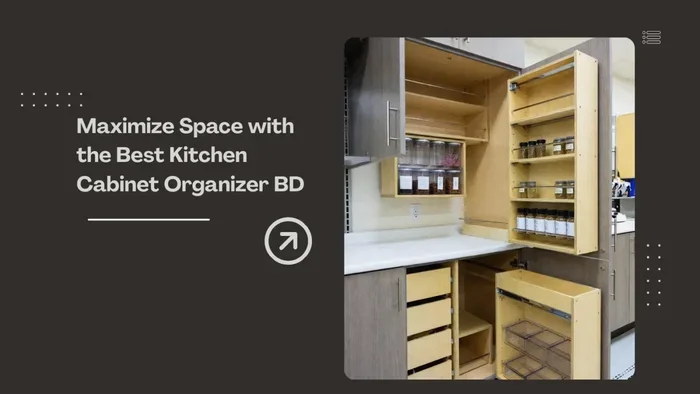
Featured image for how to kitchen cabinet organizer solutions
Image source: kitchenlink.com.bd
If your kitchen cabinets feel cramped, you are not alone. Many home cooks struggle with cluttered shelves and hard-to-reach items. This guide explains how to maximize kitchen cabinet space with simple organizers, clear steps, and practical storage ideas that fit real kitchens.
A crowded kitchen makes cooking harder and cleanup slower. When cups, bowls, and gadgets are buried behind each other, you waste time and lose space you already have. The good news is that you can fix this without a full remodel. With a few smart organizers and a simple plan, you can turn messy cabinets into a smooth, easy-to-use storage system.
This guide walks you through the process step by step. You will learn how to clear out your cabinets, measure your space, choose the right organizers, and arrange everything so it is easy to reach. You will also find tips for small kitchens, deep shelves, and tricky corners. If your goal is to maximize kitchen cabinet space, these ideas can help you build a system that actually works for your daily routine.
📑 Table of Contents
- Step One: Empty and Sort Your Cabinets
- Step Two: Measure Your Cabinet Space
- Step Three: Choose Smart Organizers That Fit
- Step Four: Arrange Items by Use and Function
- Step Five: Use Vertical Space Wisely
- Step Six: Handle Deep Cabinets and Awkward Corners
- Step Seven: Keep Small Items Under Control
- Step Eight: Maintain the System
- Troubleshooting Common Cabinet Problems
- Final Thoughts
Step One: Empty and Sort Your Cabinets
Before you buy any organizer, start with a full reset. Take everything out of the cabinets you want to improve. Place items on a table or counter so you can see what you own. This step may feel tedious, but it is the fastest way to understand what you really use and what is taking up valuable space.
Group items by category
Sort your items into simple groups such as glasses, mugs, plates, bowls, baking tools, food containers, spices, and small appliances. As you sort, ask yourself whether each item is useful, broken, duplicate, or rarely touched. If you have three measuring cups or a jar you have not opened in months, set it aside for donation or disposal.
Keep the items you reach for most
The best cabinet layouts put everyday items where your hands can find them quickly. Keep your most-used plates, glasses, and cooking tools in the easiest spots. Items you use once in a while can move to higher shelves or the back of a cabinet. This simple change makes cooking feel less stressful and helps you maximize kitchen cabinet space without adding new storage.
Step Two: Measure Your Cabinet Space
Once your cabinets are empty, take a fresh look at the actual space you have. Organizers only work well when they fit the cabinet’s height, depth, and width. A good measurement saves money and prevents frustration later.
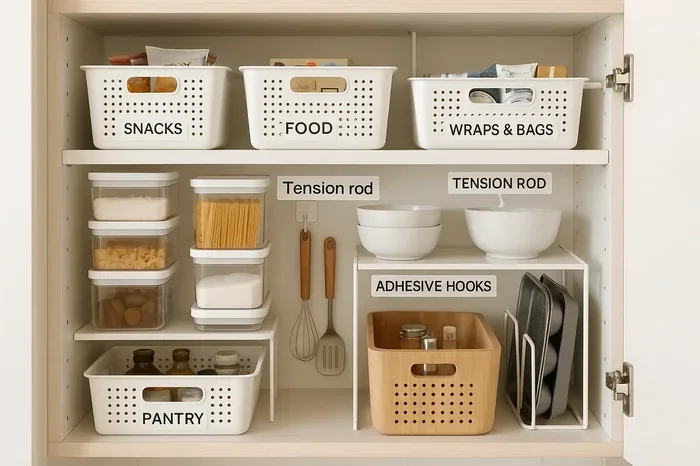
Visual guide about how to kitchen cabinet organizer solutions
Image source: smallspacetips.com
Check shelf height and depth
Use a tape measure to check the distance from the floor of the cabinet to the next shelf, as well as the depth from the front edge to the back wall. Write down the numbers for each cabinet. If your shelves are adjustable, note how much space you can create by moving them up or down.
Look for awkward spots
Not every cabinet is a perfect rectangle. Some have protruding handles, weird corners, or shelves that slope downward. Pay attention to these details because they affect which organizers will fit. For example, a narrow pull-out tray may work better in a shallow cabinet than a wide stackable bin.
Step Three: Choose Smart Organizers That Fit
Now comes the fun part. The right organizers can make a cabinet feel much larger by creating order and using space that would otherwise go wasted. The best choice depends on what you store and how your cabinets are shaped.
Shelf risers and stackable organizers
Shelf risers are great for dishes, mugs, and cans because they create a second level inside the same footprint. Stackable bins also help when you want to keep similar items together. These organizers work especially well in upper cabinets where vertical space is often underused.
Door-mounted storage
The inside of a cabinet door can hold measuring spoons, lids, foil, wrap, or small spice jars. Door racks and hanging organizers are useful when shelf space is tight. Just make sure the door can close properly after you add the storage, especially if the items stick out too far.
Pull-out trays and sliding baskets
Deep cabinets often hide items in the back. A pull-out tray or sliding basket makes those items easier to reach. This is especially helpful for heavy pots, pantry items, or cleaning supplies stored under the sink. If a full pull-out system is not an option, a simple sliding basket can still improve access.
Dividers and bins
Dividers keep baking sheets, cutting boards, and tray-like items from tumbling over each other. Bins are useful for grouping loose items such as snack packets, tea, or small pantry goods. When items stay together, it is easier to pull out one container instead of digging through a pile.
Step Four: Arrange Items by Use and Function
After you choose your organizers, place your items with purpose. A good layout saves time because everything has a home. Try to build zones that match how you cook and eat.
Create everyday zones
Put daily dishes, glasses, and mugs in the most accessible spots. If you cook often, keep cooking tools near the stove area or in a lower cabinet where they are easy to grab. If you entertain often, store serving dishes in a place that is still easy to reach, not buried behind other things.
Use upper cabinets for lighter items
Upper cabinets are often best for lighter things like glasses, mugs, and dry goods in sealed containers. Heavier items are safer and easier to manage on lower shelves. This also helps prevent strain when you reach for a heavy pot or large mixing bowl.
Keep related items together
Store lids near their containers, measuring tools near baking supplies, and coffee items together if you make coffee every morning. Grouping related items reduces clutter and makes the whole cabinet easier to maintain. This is one of the simplest ways to maximize kitchen cabinet space because it stops random items from spreading everywhere.
Step Five: Use Vertical Space Wisely
If your shelves feel cramped, look upward. Vertical space is one of the easiest places to gain extra storage without expanding the cabinet itself.
Add a second level where possible
Use risers, small stands, or stackable containers to create more layers on a single shelf. This works well for plates, cans, and cups. Just leave enough room to remove items comfortably. If the stack is too tight, it becomes annoying to use, and you may stop using the system altogether.
Use the full shelf height
Sometimes a shelf sits too low for tall items. If your shelves are adjustable, raise one to fit taller bottles, containers, or appliances. If they are not adjustable, consider a freestanding organizer that uses vertical space without needing a shelf change.
Step Six: Handle Deep Cabinets and Awkward Corners
Deep cabinets and corner spaces can be frustrating because items disappear into the back. With the right approach, these areas can become useful instead of forgotten.
Store less-used items in the back
Deep cabinets work best when the items you use rarely sit in the back and the items you use often sit near the front. Consider a sliding tray, pull-out basket, or tiered organizer if you want easier access. This keeps the cabinet functional instead of becoming a place where things get lost.
Make corners easier to reach
Corner cabinets can be tricky, but the right organizer can help. Lazy Susans, rotating trays, or corner bins can make spices, jars, and small items easier to grab. If a rotating organizer does not fit, a simple bin placed at the front can still improve visibility.
Step Seven: Keep Small Items Under Control
Small items create a lot of visual clutter very quickly. Loose packets, spice jars, bottle caps, and small tools can make a cabinet look messy even when the total amount of stuff is not that large.
Use bins for loose items
Small bins or baskets help keep tiny items together. For example, one bin can hold snack bags, another can hold tea, and another can hold baking add-ons. When you need something, you lift the bin instead of sorting through a pile.
Contain duplicates and backups
If you keep backup items, place them in one designated spot. That way, you know what you have and do not accidentally buy more than you need. This habit also makes it easier to notice when a cabinet is starting to fill up again.
Step Eight: Maintain the System
An organized cabinet only stays organized if you keep up with it. The good news is that maintenance does not have to be a big project. A few small habits can keep your cabinets working well.
Reset after each big cooking session
After a holiday meal or a busy weekend of cooking, put items back where they belong. Wipe out crumbs, check for stray lids, and return anything that wandered into the wrong cabinet. A quick reset keeps clutter from building up.
Do a monthly check
Once a month, look through the cabinets you organized. Remove anything broken, expired, duplicate, or no longer useful. This is also a good time to see whether your organizers still fit your needs. If your habits have changed, your storage setup can change too.
Troubleshooting Common Cabinet Problems
Even with a good plan, some cabinets can still feel stubborn. Here are a few common issues and simple ways to handle them.
The cabinet still feels crowded
If the space still feels tight, you may have more items than the cabinet can comfortably hold. Try removing duplicates, storing seasonal items elsewhere, or moving less-used tools to another room. Sometimes the best solution is to reduce what you keep, not just rearrange it.
Organizers do not fit well
If an organizer is awkward or blocks the door, measure again and compare it with your cabinet dimensions. A product that looks good online may not suit your cabinet shape. In that case, a simpler bin, divider, or riser may work better than a complex system.
Items keep getting mixed up again
If things drift back into chaos, the zones may be too complicated. Simplify by using fewer categories and clearer containers. Labeled bins can help everyone in the household know where items belong.
Final Thoughts
A better-organized kitchen does not require a huge renovation. It starts with a clear plan, a careful sort, and the right organizers for your space. When you measure carefully, use vertical space, and group items by how you actually use them, your cabinets become easier to live with every day. If you want to maximize kitchen cabinet space, focus on making the system simple enough that you can keep it working long term. Small changes often make the biggest difference.