
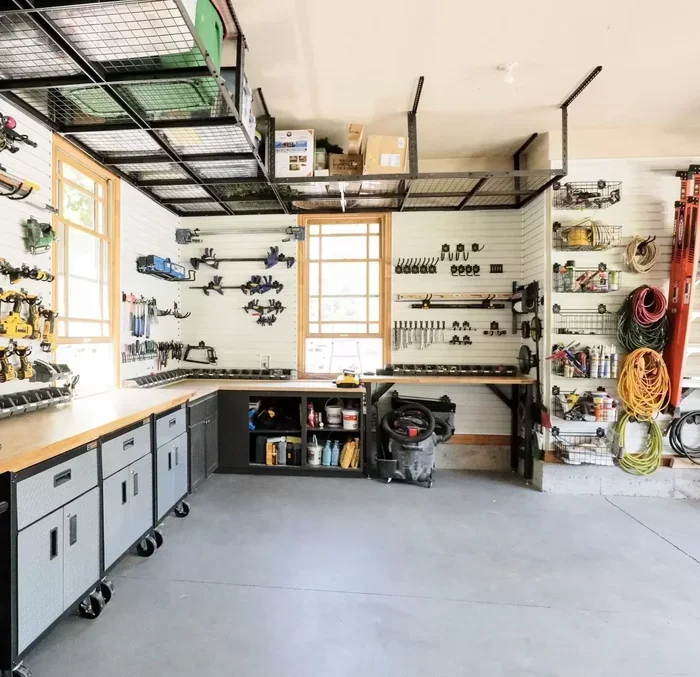
Featured image for how to organized budget garage storage
Image source: extremediy.org
Organizing a messy garage on a tight budget is possible when you work in small zones, reuse what you already own, and focus on function before fancy storage. This step-by-step guide shows you how to sort, group, and store items without overspending on expensive shelving or pre-made systems. You will also learn low-cost habits that help keep the space usable after the first cleanup.
📑 Table of Contents
- Why a Tight-Budget Garage Cleanup Can Still Work
- Step 1: Set a Realistic Plan Before You Touch Anything
- Step 2: Clear Out the Obvious Clutter First
- Step 3: Group Similar Items So You Can See What You Own
- Step 4: Build Low-Cost Storage With What You Already Have
- Step 5: Label Everything and Give Each Item a Home
- Step 6: Clean As You Go So the Space Feels Fresh
- Step 7: Create a Maintenance Routine That Fits Real Life
- Troubleshooting Common Garage Organization Problems
- When a Tight-Budget Approach Makes the Most Sense
- Final Thoughts on Organizing a Messy Garage Without Overspending
Why a Tight-Budget Garage Cleanup Can Still Work
A cluttered garage can feel frustrating, especially when you think organizing it requires expensive shelving, custom cabinets, or a full weekend renovation. The good news is that a messy garage does not have to become a big-ticket project. In fact, some of the most useful organizing systems are simple, flexible, and affordable. The key is to focus on decisions first and containers second.
When you start with a budget-friendly mindset, you stop trying to buy your way out of the mess. Instead, you create a system that fits the space you already have. That means using what is available, repurposing sturdy items, and building order in small steps. This approach is often better than rushing into expensive storage products because it forces you to sort through the clutter before adding more bins.
This guide walks you through a practical process for turning a crowded garage into a more usable space without stretching your budget. You will learn how to plan the work, sort the contents, build low-cost storage, and keep the space from sliding back into chaos. The goal is not perfection. The goal is a garage that is easier to move through, easier to use, and easier to maintain.
Step 1: Set a Realistic Plan Before You Touch Anything
The first step is to make the project feel manageable. A garage can hold years of accumulated items, and trying to organize everything at once often leads to burnout. A better approach is to define the scope, set a simple timeline, and decide what success looks like for your household.
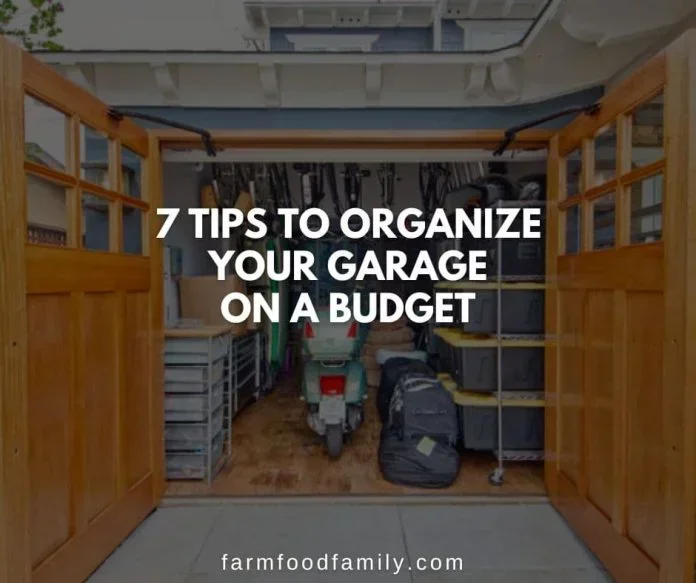
Visual guide about how to organized budget garage storage
Image source: images.farmfoodfamily.com
Choose Your Starting Zone
Look at the garage and pick one area to start. That might be a workbench corner, a wall of shelves, the area near the door, or a single stack of mixed boxes. Starting small gives you a quick win, which helps you stay motivated. If the whole garage is overwhelming, think of it as a series of smaller jobs instead of one giant job.
Define the Purpose of the Space
Before you move items around, decide how you want the garage to function. Do you need space for parking, projects, sports gear, recycling, or seasonal storage? The answer matters because a garage organized for one purpose looks different from a garage organized for another. For example, a space used mostly for tools should keep frequently used items easy to reach, while a space used for long-term storage can place less-used items higher up or farther back.
Set a Budget Limit
Even a tight-budget project benefits from a clear spending limit. Decide how much you are willing to spend before you begin shopping. That limit helps you stay creative with what you already own and prevents impulse buys. If you do need to purchase a few items, choose only the pieces that solve a specific problem, such as a set of sturdy hooks or a small number of uniform containers.
Gather Basic Supplies
You do not need fancy organizing products to begin. A few simple supplies are usually enough:
- Trash bags for broken or unusable items
- Boxes or bins for sorting keep, donate, and sell piles
- Markers and tape for quick labels
- Cleaning basics such as a broom, dustpan, rags, and gloves
- A notebook or phone note to record what you find and what storage gaps you notice
If you already have spare containers at home, set them aside before you start. Reusing what you own is one of the easiest ways to keep costs down.
Step 2: Clear Out the Obvious Clutter First
Before you build any storage system, remove the items that do not belong in the garage at all or are no longer useful. This step makes the rest of the project easier because you are not organizing around broken, duplicate, or forgotten items.
Do a Fast First Pass
Walk through the garage and pick up the obvious trash, broken tools, empty containers, and items that are clearly past their useful life. This is not the time to overthink every object. The goal is to remove the easiest decisions first. A quick first pass can make the space feel lighter immediately.
Separate Items That Belong Elsewhere
Garages often become catch-all spaces for things that really belong in the house, shed, recycling area, or donation pile. Create a separate spot for these items so they do not get mixed back into the garage contents. If something belongs in another room, set it aside for now and return it later. This keeps the garage project focused.
Make Decisions in Categories
As you sort, use simple categories instead of vague piles. For example:
- Keep: items you use, need, or realistically plan to use soon
- Donate: usable items someone else could benefit from
- Sell: items that may have enough value to list or take to a sale
- Recycle: materials that can be processed instead of tossed
- Trash: damaged or unusable items
This kind of sorting makes the next step much easier because you are no longer trying to organize a mix of useful and unnecessary items.
Step 3: Group Similar Items So You Can See What You Own
After the obvious clutter is gone, the next step is to understand what remains. A messy garage often feels chaotic because similar items are scattered in different places. Grouping related items helps you see patterns, duplicates, and storage needs.
Create Temporary Sorting Areas
Use the floor, a driveway space, or a few large containers to sort items into broad groups. You might create areas for tools, sports gear, automotive supplies, gardening items, holiday decorations, and household overflow. The exact categories depend on what you own, but the idea is the same: keep related items together.
Look for Duplicates and Forgotten Items
Once items are grouped, you may notice that you own multiple versions of the same thing. Maybe there are three hammers, several nearly empty paint cans, or duplicate storage containers. This is useful information. Duplicates often reveal overbuying or long-forgotten purchases. If you have extras, you can usually keep the best one and let the others go.
Decide What Deserves Easy Access
Not every item should be stored the same way. Frequently used items should be the easiest to reach. Seasonal or occasional items can be placed in less convenient spots. For example, everyday tools might stay near the work area, while holiday decorations can move to a higher shelf or the back of a storage stack. This simple distinction makes daily use much smoother.
Step 4: Build Low-Cost Storage With What You Already Have
Once you know what you are keeping, you can start creating order. This is the stage where many people feel pressure to buy matching bins and expensive racks. But a tight budget often works better with a practical, mixed approach. Uniformity can be nice, but function matters more.
Reuse Containers Creatively
Look around your home for sturdy containers that can help organize the garage. You might use:
- Old bins or baskets for small items
- Shoe boxes for hardware, cords, or small tools
- Glass jars or sturdy food containers for screws, nails, and loose parts
- Clean buckets for brushes, cleaning supplies, or garden tools
- Larger boxes for lightweight seasonal items
The container does not need to be pretty if it is useful. What matters is that it keeps related items together and makes them easier to carry or find.
Use Simple Wall Storage
Wall space is often underused in garages. Hooks, shelves, and hanging solutions can free up floor space without requiring a major build-out. Even a few well-placed hooks can make a big difference for bikes, cords, ladders, bags, and lightweight tools. If you already have basic hardware at home, you may be able to create a simple hanging station with minimal cost.
Stack Vertically When Possible
If floor space is limited, think upward. Stackable bins, shelving, and tiered storage can help you use vertical space more efficiently. When stacking items, keep heavier things lower and lighter things higher. This is safer and makes the space easier to manage. If you use stacks, avoid making them unstable or hard to reach.
Keep Frequently Used Items Handy
One of the easiest ways to make a garage feel organized is to place the items you use most in the most accessible locations. If you always reach for the same tools, cleaning supplies, or project materials, give them a clear home near your work area. This reduces friction and makes it more likely that the system will actually work.
Step 5: Label Everything and Give Each Item a Home
A garage can look tidy for a while, but without labels and assigned spots, it often becomes messy again. Labels are not just for aesthetics. They reduce guessing and make it easier for everyone in the household to put things back where they belong.
Label in a Way You Will Actually Use
You do not need a complicated labeling system. Simple tape and a marker can work well. You can also use large printed labels, chalkboard tags, or masking tape for a temporary setup. The best label is the one that is easy to read and easy to maintain. If the system is too fussy, it may not last.
Assign One Home per Category
Each group of items should have a clear location. For example, all gardening supplies might live in one area, all sports equipment in another, and all tools in a third. When items have homes, cleanup becomes faster because you are not deciding from scratch every time.
Make the System Easy for the Whole Household
If other people use the garage, the system should make sense to them too. That may mean placing children’s sports gear lower, keeping commonly used household items visible, or making sure labels are clear. A system that only one person understands is harder to maintain.
Step 6: Clean As You Go So the Space Feels Fresh
Organizing is easier when the space is clean enough to see what you have. Dust, cobwebs, and debris can make even a well-sorted garage feel neglected. You do not need to deep-clean the entire structure in one day, but a basic cleanup helps the results feel more rewarding.
Sweep and Wipe Key Areas
Focus on the areas you use most. Sweep the floor, wipe down shelves or work surfaces, and remove dust from items you plan to keep. If there are sticky spots, spills, or dirty containers, clean them before putting them back into the system. This makes the space more pleasant to use and helps you notice damage or leaks early.
Check for Safety Issues
While cleaning, look for signs of trouble such as frayed cords, leaking containers, unstable stacks, or sharp edges on old tools. A safe garage is more important than a perfectly organized one. If something looks hazardous, deal with it before giving it a new home.
Step 7: Create a Maintenance Routine That Fits Real Life
The last step is often the most important. A garage on a tight budget can stay organized if you build in small habits. Without maintenance, clutter tends to return quietly over time.
Use a Quick Reset Habit
Set aside a short time each week or month to put items back in place, remove trash, and check for new clutter. A fifteen-minute reset is often easier than waiting until the garage needs a major overhaul. The point is to catch small messes before they grow.
Put Things Back Immediately When Possible
The easiest way to stay organized is to return items to their assigned spot as soon as you finish using them. If that is not always possible, create a temporary drop zone for items that need to be sorted later. Just make sure the drop zone does not become a permanent pile.
Review the System Seasonally
Every few months, take a quick look at what is working and what is not. Maybe one shelf is too crowded, one category has spread into another area, or a container is no longer the right size. Small adjustments are normal. A good system should evolve as your needs change.
Troubleshooting Common Garage Organization Problems
Even a budget-friendly garage project can hit snags. Here are a few common issues and simple ways to handle them.
The Space Still Feels Crowded
If the garage is still cramped after sorting, look for items that can be donated, sold, or stored elsewhere. Sometimes the problem is not a lack of storage but simply too much stuff. Reducing volume often creates more usable space than adding more shelves.
You Cannot Find Things After Organizing
If items are getting lost, your categories may be too vague or your labels too unclear. Try making the groups more specific and placing the most-used items in easier-to-see locations. A quick inventory note can also help you remember where things went.
The System Is Too Complicated to Maintain
If the setup feels burdensome, simplify it. Reduce the number of categories, use fewer containers, and make the most-used items easier to access. A simple system that people actually follow is better than a detailed one that gets ignored.
You Keep Adding New Items
New purchases can slowly undo your progress. Before bringing something into the garage, ask whether it has a clear home and whether it is worth the space it will take. A little hesitation at the entry point can prevent a lot of clutter later.
When a Tight-Budget Approach Makes the Most Sense
A low-cost garage organization plan is especially useful when you want progress without debt, when the garage is a mixed-use space, or when your clutter is still changing. It also works well if you enjoy reusing materials and prefer a flexible setup over a rigid one. You do not need a perfect storage system to make the space more functional. You just need a process that helps you sort, store, and maintain with intention.
That said, some situations call for extra care. If you are dealing with hazardous materials, heavy items that are hard to move, or structural concerns, it may be wise to get help before reorganizing. Safety always comes first.
Final Thoughts on Organizing a Messy Garage Without Overspending
Organizing a messy garage on a tight budget is less about buying the right products and more about making clear decisions. Start small, sort decisively, reuse what you already own, and build simple storage that matches how you actually use the space. Once every category has a home and the most-used items are easy to reach, the garage becomes much easier to live with.
The best part of this approach is that it can be done gradually. You do not need to transform the entire garage in one weekend. A few focused sessions, a realistic budget, and a habit of quick resets can turn a crowded garage into a space that feels calmer, safer, and far more useful.