
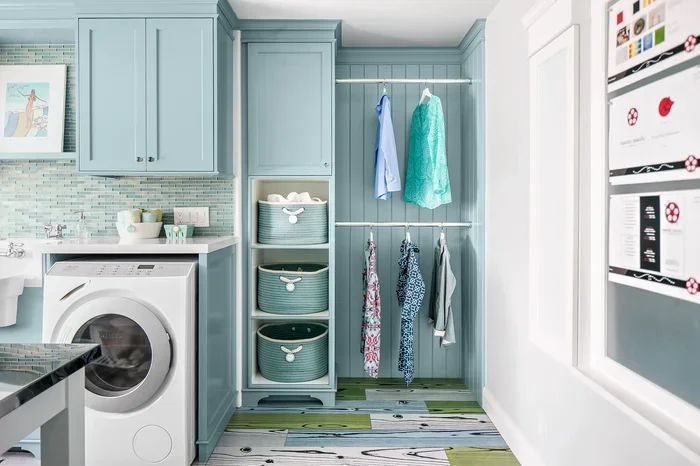
Featured image for how to small laundry room storage
Image source: bhg.com
A small laundry room does not have to feel cramped or chaotic. With a few smart storage tips, you can create a clean, efficient space that makes laundry day easier. This guide walks you through practical steps to sort, store, and streamline every corner of your laundry area.
If your laundry room feels more like a crowded storage closet than a functional workspace, you are not alone. Many homes have a small laundry room that has to handle detergent, baskets, ironing, folding, and all the little tools that come with washing clothes. The good news is that you do not need a huge room or expensive renovations to make it work better. With a few smart storage tips, you can turn a cramped laundry area into a simple, orderly space that saves time and reduces frustration.
This guide explains how to organize a small laundry room step by step. You will learn how to clear out what you do not need, plan storage around the space you actually have, and set up systems that are easy to maintain. The focus is on practical solutions that fit real life, not perfect magazine setups. If your room is tiny, awkwardly shaped, or packed with items that belong elsewhere, these ideas can help you make it feel more manageable.
📑 Table of Contents
- Step 1: Empty the Room and Take a Fresh Look
- Step 2: Measure Your Space and Plan the Layout
- Step 3: Use Vertical Space to Gain Storage
- Step 4: Set Up a Simple Sorting System
- Step 5: Store Supplies Where You Can Reach Them Easily
- Step 6: Make the Most of Folding and Drying Space
- Step 7: Tame Small Items and Laundry Tools
- Step 8: Keep the Room Clean and Easy to Maintain
- Troubleshooting Common Laundry Room Problems
- Conclusion
Step 1: Empty the Room and Take a Fresh Look
Before you buy bins, shelves, or labels, start by removing everything from the room. This gives you a clear view of the space and helps you notice what you really use. Put detergent, baskets, fabric softener, stain treatments, cleaning cloths, and any stray items on a table or in a nearby room temporarily. Once the room is empty, wipe down shelves, sweep the floor, and check for dust, spills, or anything that needs a quick clean.
As you look around, notice the room’s layout. Where are the washer and dryer? Is there a sink? Are there walls, doors, or corners that are not being used? Small laundry rooms often have one or two underused surfaces or vertical spaces that can hold more than you think. This is also a good time to separate items that belong in the laundry room from things that simply ended up there.
Sort Items into Keep, Relocate, and Donate
Create three simple groups as you go through everything. Keep the items you use regularly, such as laundry detergent, stain remover, and a few cleaning supplies. Relocate items that do not belong in the laundry room, like office supplies, random tools, or seasonal decorations. If you find duplicates, damaged products, or supplies you no longer use, set them aside for donation, disposal, or recycling if appropriate.
This step matters because a small laundry room can become cluttered fast when it turns into a catch-all space. The more you can remove, the easier it is to organize what remains. If you are unsure about an item, ask yourself when you last used it. If the answer is “not in a long time,” it may be taking up valuable space.
Step 2: Measure Your Space and Plan the Layout
Once the room is cleared, measure the important areas. Check the width and height of available wall space, the depth of shelves or cabinets, and the open floor space around the washer and dryer. If you have a door, measure the clearance so you do not choose storage that blocks it. A few quick measurements can save you from buying items that look good online but do not fit in your room.
Think about how you move through the space. The best layout usually keeps the items you use most often near your workflow. For example, if you sort clothes before washing, keep hampers or sorting bins close by. If you fold right after drying, leave room for a small table, shelf, or counter area. If you mostly hang items, a wall-mounted rack or door organizer may be more useful than extra floor storage.
Choose a Simple Layout That Matches Your Routine
A small laundry room works best when the layout supports your habits instead of fighting them. If you usually carry clothes from one place to another, keep the path clear. If you like to treat stains immediately, place stain remover and a small brush near the washer. If you fold often, give yourself a flat surface or a dedicated folding zone. The goal is not to fill every inch, but to make the room easier to use.
It also helps to think in zones. One zone can hold washing supplies, another can hold drying and folding items, and another can store cleaning tools or infrequent items. Even in a small room, these zones help you find things faster and keep clutter from spreading.
Step 3: Use Vertical Space to Gain Storage
When floor space is limited, walls become your best friend. Vertical storage is one of the most effective smart storage tips for a small laundry room because it keeps items visible without crowding the floor. Wall shelves can hold detergent, fabric care products, and small baskets. A wall-mounted rack can store ironing supplies, lint rollers, or hanging items. If you have a door, an over-the-door organizer can hold socks, accessories, cleaning cloths, or small bottles.
Before installing anything, check the wall type and make sure your storage is mounted securely. Use sturdy shelves for heavier items like large detergent bottles or laundry baskets. For lighter items, smaller shelves or hooks may be enough. If you are renting or cannot drill into walls, look for tension-based solutions, freestanding shelving, or hanging organizers that do not require permanent installation.
Add Shelves, Hooks, and Hanging Storage
Shelves work well for products you use often, especially if you group them by type. Keep washing supplies on one shelf and drying or finishing supplies on another. Hooks can hold a broom, dustpan, laundry bag, or even a small hand towel for quick cleanups. Hanging storage is also useful for items that tend to create clutter, such as reusable laundry bags or mismatched sock baskets.
If you place items on shelves, keep the most frequently used things at eye level or within easy reach. Store lighter or less-used items higher up. This makes the room feel more organized because you are not constantly reaching or moving things around.
Step 4: Set Up a Simple Sorting System
A good laundry room stays organized because it has a system for sorting clothes before they go into the machine. Without a sorting method, piles can build up quickly, and the room can feel messy again in a short time. A simple setup might include separate baskets for lights, darks, delicates, and household items like towels or bedding.
You do not need a complicated system. The best sorting method is the one you will actually use. Some people prefer labeled bins, while others like color-coded hampers or open baskets. If your room is very small, choose compact bins that stack or fit on a shelf. If you have more than one person doing laundry, clear labels can reduce confusion and help everyone follow the same system.
Use Bins, Hampers, and Labels Wisely
Bins and hampers work best when they are easy to access and easy to carry. If you often move laundry from room to room, choose lightweight options with handles. If you sort directly in the laundry room, keep the bins close to the entry point so clothes do not end up in a pile on the floor. Labels can be as simple as tape, a handwritten tag, or a small printed label on each container.
It also helps to keep the sorting area tidy by emptying the bins regularly. If one basket becomes overflowing, the whole room can look disorganized. A quick reset after each load keeps the system working and prevents piles from growing into a bigger problem.
Step 5: Store Supplies Where You Can Reach Them Easily
Laundry products take up space, but they do not have to create chaos. Group similar items together so you can find them quickly. Keep detergent, fabric softener, and any regular add-ins in one area. Store stain treatments, bleach alternatives, or special care products in another spot if you use them less often. The idea is to keep everyday items close and put occasional items somewhere they will not block your workflow.
If you have shelves or cabinets, use them to keep bottles upright and stable. If products are stored on open shelves, make sure they are arranged so labels face outward and spills are less likely to spread. For small items like dryer sheets, stain sticks, or lint removers, a small bin or tray can keep them from disappearing into the clutter.
Keep Daily Essentials Close and Rarely Used Items Higher
Think about what you reach for every time you do laundry. Those items should be the easiest to grab. If you use a particular detergent every wash, keep it near the washer. If you only use a special fabric care product once in a while, store it on a higher shelf or in a cabinet. This simple arrangement saves time and keeps the room from feeling crowded with products you rarely touch.
A small tray or caddy can also help if you move supplies between locations. For example, if you sometimes treat stains at the sink or carry a basket to another room, a portable container keeps everything together. Portable storage is especially useful in a small laundry room because it gives you flexibility without adding clutter.
Step 6: Make the Most of Folding and Drying Space
Even a small laundry room can have a better folding and drying setup. If you fold clothes right away, you need a flat surface that is easy to clear. If you usually hang items, you need a place that keeps them from ending up over chairs, doors, or the side of the machine. The best solution depends on how much room you have and what you do most often.
A compact folding table, a wall-mounted drop-down surface, or even a sturdy shelf at the right height can help. If you do not have space for a permanent table, a rolling cart or a narrow shelf can give you a temporary workspace. For drying, a small rack or wall-mounted drying option can keep wet clothes off the floor and reduce clutter while they dry.
Use Compact Furniture and Temporary Work Areas
In a tight room, furniture should earn its place. A rolling cart can hold folded clothes, baskets, or supplies and move out of the way when you need floor space. A narrow shelf can act as both storage and a work surface. If you use a folding table, keep it clear when you are done so it does not become a dumping spot for random items.
If you have a dryer, remember that warm clothes often need a place to wait before folding. A small basket or a designated spot for fresh laundry can keep them from piling up. This is one of those small changes that makes a laundry room feel much more orderly.
Step 7: Tame Small Items and Laundry Tools
Small items are often the biggest source of clutter. Lint rollers, safety pins, stain pens, clothespins, measuring cups, and spare dryer sheets can scatter across shelves or hide in corners. Give these items a home so they do not drift around the room. A small container, divider tray, or basket can keep them together.
It also helps to store tools based on how you use them. If you use a lint roller often, keep it where you can see it. If you only need a measuring cup occasionally, store it with the detergent or in a smaller bin. When every little item has a place, the room feels cleaner and you spend less time searching.
Group Tiny Items in Containers or Drawers
Small containers can make a big difference. Use one container for stain treatments, another for laundry accessories, and another for cleaning tools if they share the room. Clear containers are helpful because you can see what is inside without opening them. If you prefer a cleaner look, use uniform bins or baskets that match the room’s style.
If you have a cabinet or drawer space, use it for items you want out of sight but still easy to reach. This is a good place for spare supplies, backup detergent, or less attractive storage items. Keeping the visible area tidy while storing the rest out of sight is one of the simplest ways to make a small laundry room feel larger.
Step 8: Keep the Room Clean and Easy to Maintain
Organizing a small laundry room is not a one-time project. It works best when you build a few easy habits into your routine. After each load, put supplies back where they belong, return baskets to their spots, and clear the folding area if you used one. These small actions take only a minute or two, but they prevent clutter from building up again.
It also helps to do a quick check once a week. Look for stray items, empty any bins that are getting full, and wipe down surfaces if there are spills or dust. If you notice that certain items are constantly left out, your system may need a small adjustment. Maybe a basket is in the wrong place, or a storage container is too deep or too hard to access. Small changes can make the system easier to follow.
Build a Reset Routine That Fits Your Schedule
A reset routine does not have to be complicated. You might straighten the room after every load, or you might do a short reset once a week. The best routine is one you can stick with. If the system feels too strict, you are less likely to maintain it. If it feels simple and natural, it becomes part of your laundry flow.
Seasonal reviews are also useful. Every few months, check whether you have gathered extra products, duplicate items, or supplies you no longer need. A small laundry room can stay organized longer when you periodically remove things that no longer earn their place.
Troubleshooting Common Laundry Room Problems
Even with a good plan, small laundry rooms can still create challenges. Here are a few common problems and simple ways to handle them.
If the room still feels crowded after organizing, you may be trying to store too much there. Move infrequently used items elsewhere and keep only the essentials in the laundry room. If shelves look messy, reduce the number of items on display and group them more carefully. If baskets keep overflowing, make your sorting system smaller and more specific so piles do not build up.
If you have very little wall space, focus on compact storage like narrow shelves, a rolling cart, or a door organizer. If your room has awkward corners, use them for less-used items or a basket that slides into place. If your laundry room also stores cleaning supplies or other household items, separate them clearly so the room does not become a general storage area again.
Conclusion
Learning how to organize a small laundry room is mostly about making the space work for your routine. Start by clearing out what you do not need, then measure your area and plan a layout that supports the way you actually do laundry. Use vertical space, create a simple sorting system, and keep everyday supplies within easy reach. Add compact furniture or temporary work areas if they help, and give small items a dedicated home so they do not create clutter.
The best laundry room organization is the one you can maintain without much effort. A tidy space makes laundry day feel less stressful, helps you find what you need faster, and keeps the room from becoming a catch-all for everything else in the house. With a few smart storage tips and a simple routine, even a small laundry room can feel calm, efficient, and easy to use.