
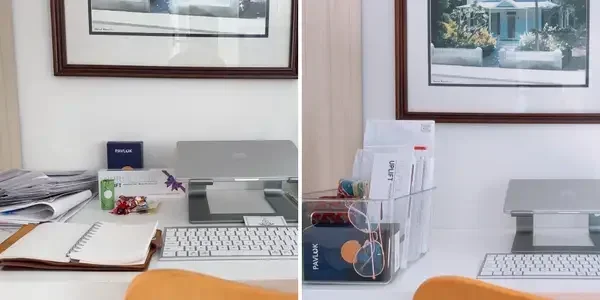
Featured image for how to Organized desk mail paperwork
Image source: i.insider.com
Cluttered desks can make everyday tasks feel harder than they need to be, especially when mail and paperwork pile up. This guide shows you how to sort, store, and maintain a calm desk setup so you can find important documents fast and keep distractions under control. With a few practical habits and simple organizers, you can turn a messy surface into a clear, usable workspace.
A messy desk can quietly drain your energy. One envelope turns into three, a bill sits next to a flyer, and suddenly the whole surface feels crowded. If you have been wondering how to organize mail and paperwork on a desk, the good news is that you do not need a perfect system or expensive tools. You need a simple routine, a few clear categories, and a place for every type of paper that enters your space.
This guide walks you through a practical approach you can set up in an afternoon and maintain with only a few minutes each day. You will learn how to clear the clutter, sort incoming mail, choose the right storage tools, and build habits that keep the desk usable. The goal is not to make your desk look perfect for a photo. The goal is to make it easier to find what matters, act on what needs attention, and stop paper from taking over.
📑 Table of Contents
- Step 1: Clear the Desk and Sort What You Have
- Step 2: Create Simple Categories for Mail and Paperwork
- Step 3: Choose Desk Organizers That Fit Your Space
- Step 4: Build a Simple Mail-Handling Routine
- Step 5: Set Up a Daily and Weekly Reset
- Step 6: Make the System Easy to Maintain
- Step 7: Handle Special Types of Paperwork
- Troubleshooting: What to Do When the Desk Gets Messy Again
- Conclusion
Step 1: Clear the Desk and Sort What You Have
Before you buy trays, labels, or folders, start with the pile that already exists. A clean surface makes the rest of the process much easier, because you can see exactly what you are dealing with.
Gather everything in one place
Remove every piece of paper from the desk and place it in one spot. Include mail, notes, receipts, folders, loose sticky notes, and anything hiding under a keyboard or monitor. If you keep paper in nearby drawers or shelves, pull out only the items that belong on the desk or that are clearly part of the same paperwork flow.
Toss the obvious trash first
As you handle each item, separate the clear candidates for disposal. Junk mail, expired coupons, duplicate copies, and old advertisements often make up a surprising amount of desk clutter. Shred or securely discard any document that contains sensitive information before you throw it away.
Group similar items together
Once the obvious trash is gone, sort the remaining papers into broad groups. You might create piles for bills, personal correspondence, school or work documents, receipts, and anything that needs a follow-up action. Do not worry about perfect labels yet. The point is to understand what kinds of paper are actually in your space.
Notice what you keep picking up
Pay attention to the papers you keep moving from one side of the desk to the other. Those items often reveal where your current system is breaking down. Maybe a bill sits there because you are waiting for a payment date, or a form is stuck because you need a signature. Recognizing these patterns helps you build a system that fits your real habits instead of an idealized version of them.
Step 2: Create Simple Categories for Mail and Paperwork
A system becomes much easier to use when it has only a few clear categories. Too many compartments can make decisions slower, while too few can leave everything mixed together. Aim for a middle ground that matches the way you actually handle paper.
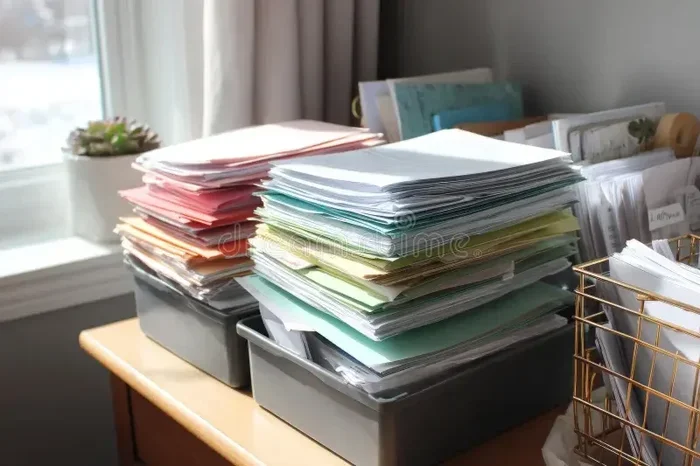
Visual guide about how to Organized desk mail paperwork
Image source: thumbs.dreamstime.com
Use a small set of everyday buckets
Most desks work well with a simple set of categories such as:
- Action needed: items that require a reply, payment, signature, or decision
- To file: documents you want to keep but do not need to handle today
- Reference: papers you may need again, such as instructions, schedules, or contact lists
- Archive or long-term keep: records you must store for taxes, warranties, or future use
If you prefer even simpler wording, you can use do something, keep handy, and store away. The best labels are the ones you will remember without thinking.
Separate urgent from important
Not every paper needs the same level of attention. A bill with a near due date and a magazine flyer are both paper, but they deserve very different treatment. If you want your desk to stay usable, give priority items a more visible spot and keep lower-priority items out of the way.
Keep personal and work items distinct if needed
If your desk handles both home and work paperwork, it can help to keep those streams separate. You may use different trays, different sides of the desk, or different folders. Clear boundaries reduce the chance that a personal envelope gets buried under work documents, or vice versa.
Step 3: Choose Desk Organizers That Fit Your Space
You do not need a large collection of containers to stay organized. In fact, too many tools can create their own clutter. Choose a few items that match the amount of paper you receive and the space you have available.
Pick trays for active paper
A shallow tray or stackable inbox can hold mail that still needs sorting or action. One tray works well for incoming items, while a second can hold documents you are actively using. Keep the trays small enough that they do not become dumping grounds. If a tray is always overflowing, it may be too large for your routine.
Use folders or dividers for categories
Folders are useful when you want to separate papers without making piles. A simple accordion folder can hold several categories in one compact space, while individual folders work well for specific projects or recurring paper types. Label each folder in plain language so you can find what you need without opening every one.
Add a small spot for supplies
Paperwork often comes with small tasks: opening envelopes, stamping forms, or clipping receipts. A compact cup or drawer insert for pens, a stapler, paper clips, and a pair of scissors can save time. When these tools are within reach, you are more likely to handle a document once and put it away instead of setting it back down.
Think vertically when space is tight
If your desk is small, use vertical space rather than spreading everything outward. A monitor riser with storage underneath, a narrow file sorter, or a wall-mounted pocket can free up the surface. The best setup is the one that keeps the desk open enough for the work you actually do.
Step 4: Build a Simple Mail-Handling Routine
The way you handle mail has a big impact on desk clutter. If every envelope passes through the same spot and gets a quick decision, paper is much less likely to spread.
Open mail over a recycling bin
When possible, open incoming mail near a recycling bin or shredding spot. Remove letters, bills, and notices from envelopes as soon as you bring them in. This small step keeps envelopes from becoming extra clutter and helps you see what you actually received.
Decide immediately when you can
For each piece of mail, make a fast choice:
- Recycle or shred: junk mail, advertisements, and anything you do not need
- Act on it: place it in your action spot if it needs a payment, reply, or signature
- File it: move keepers to the right folder or tray
- Read it later: put magazines or long newsletters in a separate reading spot, not across the main work area
The goal is to avoid setting everything down in a random stack. Even a quick decision is better than leaving paper in limbo.
Handle bills and time-sensitive items carefully
Bills, appointment notices, and forms with deadlines deserve a reliable spot. Many people find it helpful to keep these in a clearly marked tray or folder that they check on a set day each week. If you pay bills online, you may still want a short-term place for statements until they are processed.
Reduce incoming paper where possible
A cleaner desk often starts before mail arrives. Switch to digital statements, paperless reminders, and online account notices when they are available and convenient for you. Unsubscribe from catalogs or mailings you do not use. The less paper you bring in, the easier it is to keep the desk under control.
Step 5: Set Up a Daily and Weekly Reset
An organized desk stays organized through small resets, not occasional overhauls. A few minutes of maintenance can prevent the slow buildup that makes paper feel overwhelming again.
End the day with a quick return
At the end of each work session, take a moment to put active papers back where they belong. Return completed forms, file notes, and clear the action tray if it has accumulated items. If you are tired, even a one-minute reset can help you start the next day with a clearer surface.
Check the action spot regularly
Your action area should not become a permanent storage pile. Review it often enough that nothing important gets forgotten. If you see old items that no longer need attention, decide whether they can be filed, discarded, or moved to a different category.
Do a weekly paper purge
Once a week, look through the papers on your desk and ask a few simple questions:
- Do I still need this?
- Is there action left on it?
- Can this be stored somewhere else?
- Is this something I should keep for records?
A weekly review keeps categories honest. It also gives you a chance to remove papers that have outlived their usefulness.
Step 6: Make the System Easy to Maintain
A system only works if you can stick with it. The easier it is to use, the more likely it is to survive busy weeks, tired evenings, and changing routines.
Keep labels plain and visible
Clear labels reduce hesitation. Instead of guessing where a document belongs, you can place it quickly. Use short names that make sense to you, such as Bills to Pay, To File, or Active Projects. If other people use the desk, straightforward labels help everyone follow the same routine.
Limit the number of temporary piles
Temporary piles are tempting, but they often grow into permanent clutter. If you need a temporary spot for a day or two, give it a clear purpose and a clear end point. For example, you might keep a small stack for documents you will take care of before Friday. Once the deadline passes, sort the stack instead of letting it linger.
Match the setup to your habits
If you usually handle paper in the morning, place your action tray where you can reach it easily at that time. If you prefer to sort mail after dinner, keep your recycling and filing tools nearby. A system works best when it fits your natural rhythm instead of fighting it.
Use a landing spot for new paper
Even with a good routine, new mail will arrive. Give it a single landing spot so it does not scatter across the desk. That spot can be a tray, a folder, or a small section of the surface reserved for incoming items only. The key is to stop paper from spreading before you are ready to sort it.
Step 7: Handle Special Types of Paperwork
Some documents need more care than others. A general system is helpful, but a few paper types may deserve their own mini-process.
Receipts and financial records
Receipts can pile up quickly, especially if you collect them for expenses or budgeting. Decide whether you need the paper copy, a digital photo, or both. If you keep receipts for records, store them in one labeled folder or envelope instead of several loose stacks. If you use them for tracking spending, review them before they become outdated.
Important forms and signatures
Forms that need signing or sending can stall when they sit in a mixed pile. Keep them in a visible action spot and note any deadline. If a form depends on another person, set a reminder so it does not disappear into the desk for weeks.
Sentimental or occasional papers
Not every paper is purely functional. Invitations, cards, and keepsakes may matter to you even if they do not need a task-based home. Give them a separate spot so they do not mix with bills and administrative documents. That way, the desk stays practical without forcing you to treat everything as clutter.
Troubleshooting: What to Do When the Desk Gets Messy Again
Even a good setup can drift off course. The important thing is to notice the drift early and make a small correction instead of starting from scratch every time.
If paper keeps piling up, simplify the categories
When the system feels too complicated, you may be overthinking the sorting process. Reduce the number of categories, combine similar groups, or use broader labels. A simpler setup is often easier to maintain than a highly detailed one.
If you keep forgetting to file, lower the effort
Filing feels easier when it takes only a few seconds. Keep folders close to where you sort mail, and avoid making the process too many steps. If you often forget, pair filing with an existing habit, such as clearing the desk after you finish work or sorting mail right after you bring it in.
If the desk feels crowded, remove one item type
Look for the item that takes up the most space without serving a current purpose. It might be old flyers, duplicate copies, or papers you meant to read months ago. Removing one unnecessary category can make the whole surface feel lighter.
If you are overwhelmed, start with one section
You do not have to fix everything at once. Clear just the action area, or sort only today’s mail, or organize one folder. Small wins build momentum, and momentum matters more than perfection.
Conclusion
Learning how to organize mail and paperwork on a desk is less about buying the right accessories and more about creating a repeatable flow. Start by clearing what is already there, sort paper into a few clear categories, and give each type of document a place it can live. Then build a simple routine for opening mail, handling time-sensitive items, and resetting the desk before clutter gathers again.
The best system is the one you will actually use. Keep it simple, make it easy to reach, and review it often enough that small problems do not turn into big piles. With a little structure and a few steady habits, your desk can stay clear enough to work on and calm enough to enjoy.