

Replacing a dead key fob battery is easy and takes less than five minutes. You do not need special tools or a trip to the dealership. This guide shows you exactly how to replace key fob battery Toyota models using safe, step-by-step instructions. Follow these simple steps to restore your remote unlock and keyless entry right away.
There is nothing more frustrating than pressing your key button and getting no response. You stand at the curb, jiggle the remote, and wonder what went wrong. In most cases, the problem is simple. The tiny coin cell inside your remote has run out of power. The good news is that you can fix this at home in just a few minutes. You do not need advanced skills or expensive equipment. With a little guidance, you can restore your remote start, unlock, and trunk release without delay.
Many drivers assume a dead remote means a costly dealership visit. That is rarely true. A simple battery swap solves the issue for most Toyota owners. The process is straightforward, safe, and affordable. You only need the correct replacement battery and a careful hand. This guide walks you through the entire process from start to finish. You will learn what battery to buy, how to open the case, and how to test everything afterward. By the end, you will feel confident handling this task on your own.
If you have ever searched for help on this topic, you probably noticed many similar guides. Some focus on a single model, while others cover a broad range of remotes. The core steps stay very similar across most Toyota vehicles. Still, small design differences matter. That is why it helps to understand the general method first, then adjust for your specific fob. You will find clear steps, practical tips, and answers to common questions below. Let us get started.
Key Takeaways
- Quick Fix: Replacing the battery takes about three to five minutes with minimal tools.
- Right Battery: Most Toyota key fobs use a CR2032 or CR2016 coin cell battery.
- Safe Opening: Use a small flat tool or your fingernail to pry the case gently.
- Proper Seating: Match the battery polarity exactly to avoid power issues.
- Test First: Check all buttons after closing the case before assuming success.
- Model Variations: Some Toyota vehicles use slightly different fob designs, so confirm your model.
- No Reprogramming: A simple battery swap rarely requires reprogramming the key.
📑 Table of Contents
- Why Your Toyota Key Fob Needs a Battery Replacement
- Choosing the Right Battery for Your Toyota Remote
- How to Replace Key Fob Battery Toyota Safely
- Common Toyota Key Fob Designs and What Changes
- Quick Tips for a Smooth Battery Swap
- Common Mistakes to Avoid
- Expert Insights: When a Battery Swap Is Not Enough
- Key Takeaways for a Fast, Successful Swap
- Conclusion
Why Your Toyota Key Fob Needs a Battery Replacement
Your key fob is a small remote control that sends a wireless signal to your car. It handles door locks, panic alerts, and sometimes remote start. Inside the plastic case sits a tiny battery that powers that signal. Over time, that battery loses charge. Cold weather, age, and frequent use can speed up the process. When the battery gets weak, the range drops. Eventually, the buttons stop working altogether.
This is a normal part of ownership, not a sign of major failure. Most fobs use a standard coin cell battery. These batteries are inexpensive and easy to find. Replacing the battery often restores full function right away. You may notice the remote works again across a longer distance. You may also notice the buttons respond more quickly. That is because the new battery delivers clean, steady power.
It helps to recognize the early warning signs. A weakening battery often shows symptoms before it dies completely. You might need to stand closer to the car for the door to unlock. You might press the button twice before the car responds. You might see the hazard lights flash, but the doors stay locked. These clues tell you that the battery is running low. Catching the issue early saves time and prevents lockouts.
Choosing the Right Battery for Your Toyota Remote
Before you open the case, you need the correct replacement battery. Most Toyota key fobs use a CR2032 battery. Some older or special models use a CR2016 or a similar size. The exact type depends on your fob design. The safest approach is to check the old battery after opening the case. If the label is readable, match that model exactly. If the label is worn, compare the shape and size carefully.
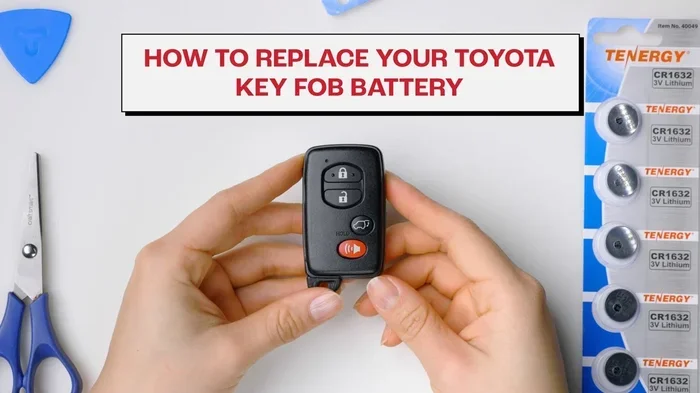
Visual guide about toyota key fob battery replacement
Image source: i.ytimg.com
Coin cell batteries are widely available at grocery stores, hardware shops, and online retailers. They are affordable and usually sold in small packs. Buying a few extras is a smart idea. That way, you have a spare for the future. Store them in a dry place away from heat. Keep them out of reach of children and pets. These batteries are small and can be mistaken for candy if left loose.
Here is a quick comparison of common battery types you may encounter:
| Battery Type | Common Use | Notes |
|---|---|---|
| CR2032 | Most Toyota key fobs | Very common, easy to find, reliable power |
| CR2016 | Some thinner fob designs | Slightly thinner, check your old battery first |
| CR2025 | Less common in Toyota remotes | Similar diameter, different thickness, verify fit |
When buying a battery, choose a trusted brand if possible. Quality matters because a weak battery can cause intermittent button response. A reputable battery also tends to last longer. Avoid mixing old and new batteries if your fob uses more than one cell. Always use a fresh battery for the best results.
How to Replace Key Fob Battery Toyota Safely
Now comes the main part. The goal is simple. Open the case, swap the battery, and close everything securely. The steps below cover the most common Toyota fob styles. If your remote looks slightly different, the same general idea still applies. Work slowly, use light pressure, and keep track of tiny parts.
Step One: Gather a Few Simple Tools
You do not need a full toolbox. A small flat tool is usually enough. Many people use a thin screwdriver, a guitar pick, or even a fingernail. A soft cloth can protect the plastic surface from scratches. Good lighting helps too. Try to work on a clean table so small parts do not get lost.
A careful setup makes the job easier. Put down a towel or mat to catch the battery if it slips. Keep your replacement battery nearby. If your fob has a mechanical key blade, note how it fits before you start. Some Toyota fobs release the blade with a small button or slider. Knowing that detail saves frustration later.
Step Two: Open the Key Fob Case
Most Toyota fobs have a seam around the edge. That seam is where the two halves meet. Start by looking for a small notch or groove. In many models, you can slide the mechanical key blade into a tiny opening to trigger a latch. In other models, you gently pry the case open along the seam. The key is to use gentle, steady pressure.
If you are unsure where to begin, check the edges carefully. Look for a small gap that gives you a starting point. Insert your tool just enough to create leverage. Do not force the case. Plastic clips can crack if you push too hard. If the case resists, move slightly along the seam and try again. A little patience goes a long way.
Some owners prefer to read a model-specific guide before opening the case. If your remote has an unusual shape, that can help. For example, you may want to review a focused walkthrough like how to change battery in Toyota Rav4 key fob if you drive a RAV4. Other owners find it useful to browse a broader walkthrough such as how to change key fob battery Toyota when they want a general overview. Either way, the main idea stays the same: open the case gently and keep the clips intact.
Step Three: Remove the Old Battery
Once the case is open, locate the battery. It usually sits in a small circular holder. You may see one side of the battery exposed. If so, lift it out carefully. If it is seated deeper, use a gentle nudge from the edge. Do not bend the metal contacts. Avoid using excessive force. The battery should come out with light pressure.
Take a moment to observe the orientation. Notice which side faces up. Look for any markings such as a plus sign or minus sign. This matters because the new battery must match the same direction. A quick photo with your phone can be helpful before you remove the old cell. That way, you have a reference if the markings are hard to read later.
Step Four: Install the New Battery
Place the new battery into the holder with the correct side facing up. Press it gently until it sits flat. It should fit snugly without being forced. If the battery feels loose, double-check the size. A wrong thickness can cause poor contact. If it feels too tight, stop and verify the model again. Forcing an ill-fitting battery can damage the contacts.
After seating the battery, check the metal tabs or contacts. They should rest against the battery surface without shifting. If a contact looks bent, straighten it very carefully. Small adjustments can improve the connection. Just be gentle. The goal is clean contact, not major repair.
If you want a more detailed look at the battery swap itself, you may find a step-focused article like how to replace a Toyota key battery useful. Different writers may show slight variations in tool choice or case style, but the core action is identical. Match the battery, seat it properly, and keep the contacts clean.
Step Five: Close the Case and Test the Fob
Before snapping the case shut, do a quick test if possible. Some fobs allow you to press the buttons while the case is open. If your design permits that, check whether the car responds. If the remote works, you are in great shape. If it does not, recheck the battery orientation and contact points. A small misalignment can cause the issue.
Once everything looks good, close the case. Align the two halves carefully. Press around the edges until the clips engage. You should feel a firm, even fit. If the case pops open again, the battery may be blocking the seam or a clip may not be seated. Open it again and inspect the edges. A proper closure should feel secure without excessive force.
After closing the case, test all functions. Press the lock button. Press the unlock button. Try the trunk release if your fob has one. If your remote includes a panic button, test that too. Walk a short distance away and see whether the signal still reaches the car. A fresh battery should restore reliable range and quick response.
Common Toyota Key Fob Designs and What Changes
Toyota uses several fob styles across its lineup. Some are compact and roundish. Some are longer and include a built-in key blade. Some have a hidden mechanical key inside a side slot. These design differences affect how you open the case. They do not usually change the battery replacement idea, but they do change the first step.
A standard remote fob often has a clear seam and a simple clasp design. That makes opening easier. A smart key or proximity fob may have a more molded shell. In that case, you may need to find a small release point or a hidden slot. A fob with a physical key blade may use that blade to trigger the opening latch. Knowing your fob style helps you choose the right approach.
If you are not sure which style you have, compare the shape and features. Look for a button that releases a key. Look for a visible seam. Look for a small slot near the edge. These clues tell you how the case is meant to open. If your vehicle uses a more advanced remote, you may also want to read a focused guide such as how to open key fob Toyota for extra clarity on the first step.
Quick Tips for a Smooth Battery Swap
A few small habits make this job easier and safer. Use light pressure when prying the case. Work on a clean surface so the battery does not roll away. Keep the old battery until you confirm the new one works. Take a photo of the battery orientation before removal. Test the buttons before sealing the case completely. These simple habits prevent common headaches.
It also helps to keep a spare battery in your home drawer or glovebox area. That way, you are ready if the remote fades again later. If you live in a very hot or very cold climate, check the battery sooner rather than later. Temperature extremes can shorten battery life. A quick check once a year can save you from an unexpected dead remote.
If your fob has a mechanical key, practice removing and reinserting it before you close everything. That ensures you understand the release mechanism. It also reduces the chance of scratching the case while fumbling at the curb. A little practice now can save time later.
Common Mistakes to Avoid
Even a simple job can go sideways if you rush. Here are the most common mistakes and how to avoid them:
- Forcing the case: Plastic clips break easily. Apply gentle pressure and move slowly along the seam.
- Wrong battery size: A battery that is too thin or too thick may not make proper contact. Verify the model before installing.
- Reversed polarity: Installing the battery backward can stop the fob from working. Match the orientation exactly.
- Ignoring bent contacts: A slightly bent metal tab can break the connection. Straighten it carefully if needed.
- Skipping the test: Close the case only after confirming the battery and contacts are correct.
- Losing the old battery: Keep it until the new one is verified. It can serve as a reference if needed.
Avoiding these mistakes keeps the repair quick and stress-free. The process should feel simple, not frustrating. If something does not fit, pause and inspect it. A few extra seconds of checking can prevent a bigger problem.
Expert Insights: When a Battery Swap Is Not Enough
Most of the time, a new battery solves the problem. Sometimes, though, the issue is not the battery. A fob can fail for other reasons. The internal circuit may have a fault. The case may have damage from a drop. The car may not recognize the remote after a battery change if the system needs a reset. Those situations are less common, but they do happen.
If the new battery does not fix the issue, try a few simple checks. Confirm the battery is fresh and seated correctly. Make sure the contacts are clean and not corroded. Test the remote near the car in case the signal is weak. If your vehicle has another key, try that one. If the second key works, the problem is likely the fob itself. If neither key works, the issue may be with the car’s receiver or settings.
In some cases, owners also look into programming support. A battery replacement usually does not require reprogramming. Still, if the remote was reset or damaged, you may need additional help. If you ever need that kind of support, you can explore a programming-focused guide like how to program key fob Toyota for general context. That way, you know where to look if your situation is more complex.
Key Takeaways for a Fast, Successful Swap
Replacing the battery is one of the easiest maintenance tasks you can do yourself. It saves time, saves money, and gets you back on the road quickly. The most important things to remember are simple. Use the correct battery. Open the case gently. Match the polarity. Test before closing. Keep the process calm and steady.
If you follow those basics, you will likely finish the job in minutes. You will also avoid unnecessary dealership visits for a problem that is usually tiny and fixable. That is a win in any driver’s book.
Conclusion
A dead remote should not ruin your day. When you know how to replace key fob battery Toyota models, the fix becomes quick and manageable. You only need the right battery, a careful hand, and a few minutes of focus. Open the case gently, swap the cell, and test every button before you finish. With this simple routine, your remote can work like new again.
Keep a spare battery on hand and check your fob if the range starts to drop. Those small habits make future problems less likely. If your fob has a unique shape or a hidden latch, take a moment to identify the opening point before you apply pressure. That small bit of preparation makes the whole process smoother.
You now have a clear path to restore your remote lock, unlock, and start functions. Use this guide the next time your Toyota key fob stops responding. A tiny battery change can make a big difference.
Frequently Asked Questions
What battery does a Toyota key fob usually use?
Most Toyota key fobs use a CR2032 coin cell battery, though some models may use a CR2016 or similar size. The safest way to know for sure is to check the label on the old battery after opening the case. Match the exact model before installing the new one.
Do I need to reprogram the key fob after changing the battery?
In most cases, no. A simple battery replacement does not erase the fob’s programming. If the remote still works after the swap, you are done. If it does not respond, double-check the battery orientation and contact points before assuming reprogramming is needed.
How long does it take to replace a Toyota key fob battery?
It usually takes about three to five minutes once you have the right battery and a small opening tool. The exact time depends on your fob design and how comfortable you are with prying the case open. Working slowly at first helps prevent damage.
What should I do if my key fob still does not work after the battery change?
First, confirm the battery is fresh and installed with the correct polarity. Then check that the metal contacts are clean and properly touching the battery. If the fob still fails, try another key if you have one. If the second key works, the first fob may have a internal issue.
Can I open the Toyota key fob with my fingernail?
Sometimes yes, especially if the case has a visible seam and a loose clasp. Many fobs open more easily with a small flat tool, but a fingernail can work on simpler designs. Use gentle pressure and stop if the plastic resists to avoid cracking the case.
Where can I buy a replacement battery for my Toyota remote?
You can usually find the correct coin cell battery at grocery stores, hardware stores, pharmacies, and online shops. Look for a trusted brand and buy a small pack so you have a spare. Keep the batteries stored safely away from heat and out of reach of children.