
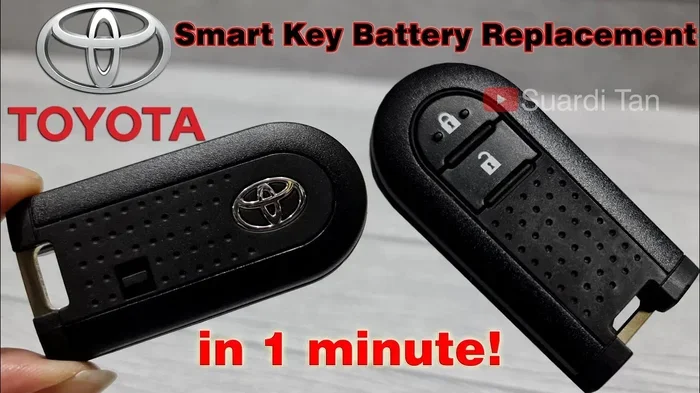
Replacing your Toyota key fob battery is easy and takes just a few minutes. You do not need a mechanic or expensive tools. This guide shows you how to replace the battery in a Toyota key fob step by step. You will learn the right battery type, safe opening methods, and testing tips. Follow these simple steps to get your remote working again fast.
This is a comprehensive guide about how to replace the battery in a toyota key fob.

Visual guide about Toyota key fob battery replacement
Image source: i.ytimg.com
Key Takeaways
- Right battery matters: Most Toyota fobs use a CR2032 or CR1632 coin cell battery.
- Safe opening saves damage: Use a soft cloth and gentle pressure to avoid scratching your key.
- Simple tools work best: A small flathead screwdriver or the emergency key blade can pop the case open.
- Watch the circuit board: Keep the electronics dry and clean during the swap.
- Test before closing: Check the remote buttons before snapping the cover back on.
- Keep a spare battery: Store an extra battery in your desk or car glove box for quick fixes.
- Reset if needed: Some models may need a quick re-sync after the battery change.
[FEATURED_IMAGE_PLACEHOLDER]
Have you ever pressed your key button and got no response? It feels frustrating. The good news is that this problem is usually simple. A dead coin battery is the most common cause. You can fix it at home in minutes.
This guide walks you through how to replace the battery in a Toyota key fob without stress. You will see what tools you need. You will learn safe opening tricks. You will also learn how to test your remote before you finish. No guesswork. No extra cost. Just a clear path to a working key.
Let us start with the basics. A key fob is a small remote that locks and unlocks your car. It also may start your push button ignition. Inside the case sits a tiny battery. That battery loses power over time. When it gets weak, your buttons stop working. Replacing it restores the signal. It also helps you avoid a lockout or a no-start moment.
What You Need Before You Start
Preparation makes the job smooth. You do not need a big toolbox. A few simple items are enough. Gather them first. Then you can work quickly and safely.
Here is a short list of helpful items:
- New battery: Check your old battery first. Most Toyota fobs use a CR2032 or a CR1632. Some older models use a CR2025. Match the size and voltage.
- Soft cloth or microfiber towel: This protects the plastic from scratches.
- Small flathead screwdriver or coin: A thin tool helps pry the case open.
- Emergency key blade: Many Toyota keys have a small metal blade. It can double as a pry tool.
- Good lighting: A bright lamp or phone light helps you see small parts.
- Clean workspace: A flat table keeps tiny pieces from rolling away.
A quick note on safety. Coin batteries are small. Keep them away from children and pets. Do not force the case. Plastic clips can break if you push too hard. Gentle pressure works best. If your key has a removable blade, pull it out first. This gives you a better grip and more room to work.
Before you open anything, look at the old battery. Write down the number on the label. This step saves a second trip to the store. It also helps you buy the exact match. A correct battery fits snugly. It also holds the right voltage for your remote circuit.
How to Identify Your Toyota Key Fob Type
Toyota makes several key styles. The battery change is similar in most cases. Still, it helps to know your style. The shape tells you where to pry. It also tells you which battery to buy.
Common Toyota fob styles include:
- Standard remote key: A compact case with a single battery. Buttons sit on the front.
- Smart key or push button key: A slightly larger case. It may have a key blade stored inside.
- Older remote head key: The battery sits in the wide head of the key.
Look at the seam on your key. Find the line where the two halves meet. That line is your opening point. If your key has a small slot, use a coin or thin tool there. If it has a removable blade, use the blade slot to lift the case. Some models have a tiny release button. Press it gently before prying.
You can also check the battery compartment after opening. The battery label will show the size. That number is your guide for the replacement. If the battery is round and flat, it is a coin cell. Match the diameter and thickness. A wrong size may not seat properly. That can cause weak signal or quick failure.
Quick Tip
Take a photo of the old battery before you remove it. The photo helps you confirm the part number later. It also helps if you need to show a store clerk. This small step saves time and confusion.
Step by Step Battery Replacement
Now you are ready to swap the battery. Follow these steps in order. Work slowly. Keep track of small parts. The goal is a clean swap with no damage.
Step 1: Open the case. Place your key on a soft cloth. Find the seam. Insert a thin tool at the edge. Twist gently to release the first clip. Move along the seam and release the next clips. Do not force it. If the case resists, check for a hidden button or slot. Some keys need the emergency blade removed first.
Step 2: Lift the cover. Once the clips are loose, lift the top half. Some keys have a cover that snaps off. Others have a hinged section. Move carefully. You do not want to tear the plastic or strain the internal tabs.
Step 3: Note the battery orientation. Look at the battery before you touch it. See which side faces up. Usually the positive side shows the number. The negative side is flat. This orientation matters. Put the new battery in the same direction.
Step 4: Remove the old battery. Use a light touch. A coin battery may sit in a small tray or under a clip. Slide it out gently. If it sticks, check for a retaining tab. Do not use metal tools that can short the battery. A plastic pick or your fingernail works well.
Step 5: Insert the new battery. Place the new cell in the same spot. Match the orientation you noted earlier. Press it down until it sits flat. It should fit without much force. If it feels loose, check the size again. A correct battery snaps into place with a firm, even seat.
Step 6: Replace the cover. Align the two halves. Press around the seam. Start at one corner and work across. Listen for soft clicks. Those clicks mean the clips are locked. Run your finger along the edge to check for gaps. A clean seal keeps the case secure.
Step 7: Reinsert the emergency blade. If you removed the blade, slide it back in. It should click into place. This blade is useful if the battery dies again and you need to unlock the door manually.
Common Mistakes to Avoid
A few small errors can cause trouble. Here are the most common ones:
- Wrong battery size: A thicker or thinner cell may not fit. Always match the label.
- Reversed polarity: Flip the battery the wrong way and the remote may not work. Check the marks.
- Prying too hard: Heavy force can crack the case. Use gentle pressure and a soft cloth.
- Dropping the battery: A coin cell can roll away fast. Work over a towel or tray.
- Skipping the test: Snap the case closed before testing. That can leave you with a dead remote and a sealed case.
Quick Tip
Use a small piece of tape on the battery tray if the new cell feels loose. A tiny strip can hold it steady during closing. Keep the tape thin. Do not cover the contacts. This trick helps with worn trays that no longer grip well.
Testing Your Key After the Swap
Testing matters. You want to confirm the remote works before you finish. Do this right away. It saves time and avoids a second opening.
Try these simple checks:
- Press the lock button. Watch for a response from the car. You may see a flash or hear a chirp.
- Press the unlock button. Confirm the doors respond.
- Check the trunk or panic button. If your key has these, test them too.
- Stand closer first. Test from a short distance. Then try a few steps back.
- Try the car start. If your key starts the engine, place it in the slot or hold it on the start button. Confirm the car recognizes the key.
If the buttons do not respond, do not panic. A few things can cause a false failure. The battery may not be seated fully. The contacts may need a gentle clean. The car may need a quick re-sync. Try these fixes in order.
First, open the case again. Check the battery position. Press it down firmly. Make sure the positive side matches the mark. Second, inspect the metal contacts. If they look dull or dirty, clean them with a dry cloth. Do not use water. Do not use liquid cleaner. A dry wipe is enough for light residue. Third, test again from close range. If the remote still fails, the battery may be dead on arrival. Try a fresh cell from a new pack.
Expert Insight
Many remote issues are not battery problems. Sometimes the car antenna or door module has a glitch. If a fresh battery does not help, try locking and unlocking with the physical key. Then try the remote again. A simple reset of the car electronics can clear a temporary fault. Turn the car off. Lock it with the key. Wait a minute. Try the remote again. This small pause can restore the signal path.
Battery Selection and Where to Buy
The right battery makes the job easy. The wrong one causes headaches. Start with the label on your old cell. Match the code exactly. Most Toyota fobs use a standard coin battery. The two most common sizes are CR2032 and CR1632. Some models use a CR2025. The code tells you the diameter and thickness. It also tells you the voltage. A correct match keeps the circuit stable.
You can find these batteries in many places. Here are good options:
- Auto parts stores: These shops often stock common fob batteries near the key section.
- Pharmacies and grocery stores: Look in the battery aisle. Coin cells are common there.
- Electronics stores: These stores usually carry several sizes and brands.
- Online retailers: Good for bulk packs. A multi pack costs less per battery.
Choose a reputable brand. A quality cell lasts longer and holds voltage better. Cheap cells can fade quickly. That means your remote may fail again soon. Check the package date if you can. Fresh batteries perform better. Store them in a cool, dry place until you need them.
If you own more than one Toyota key, replace both batteries at once. This keeps them on the same schedule. It also gives you a spare that you know works. Keep one key in your pocket and one in your bag. That simple habit reduces lockout risk.
Quick Tip
Buy a small pack of two or four batteries. Keep one in your desk drawer. Keep one in the car glove box. This way, you can fix a dead fob anywhere. A spare battery is a small insurance policy. It saves time and stress.
Troubleshooting and Re-Syncing Your Key
Sometimes the battery swap is only part of the fix. Your key may need a quick reset. This is common after a power loss. The car may not recognize the remote right away. A short re-sync usually solves it.
Try these steps:
- Lock and unlock with the physical key. This confirms the car door mechanism works.
- Place the key in the start slot or hold it near the start button. This helps the car read the chip.
- Turn the ignition on and off. A quick cycle can clear a temporary error.
- Test the remote again. Press the buttons from a short distance.
- Repeat if needed. Some models need two or three cycles to re-sync.
If the key still fails, check for a deeper issue. A damaged case can block the signal. A cracked circuit board can stop the remote. Water damage can corrode the contacts. In these cases, a battery swap will not fix the problem. You may need a replacement fob or a professional check.
Also consider the battery quality. A weak cell may power the chip but not the transmitter. That means the car sees the key, but the buttons do not work. If you have a fresh battery and the buttons still fail, try another cell. A different pack may solve it.
Expert Insight
Keep your key dry and clean. Sweat, rain, and dust can wear the contacts over time. Wipe the case with a dry cloth now and then. Avoid harsh cleaners. They can damage the plastic and the seal. A little care extends the life of the fob and the battery.
When to Replace the Whole Key Fob
Most of the time, a battery change is enough. Sometimes the fob itself is the issue. Watch for these signs:
- Cracked case: A broken shell can let in moisture and debris.
- Loose or missing clips: The cover may not seal well. The battery may fall out.
- Corroded contacts: Rust or buildup can block power.
- Dead remote after multiple fresh batteries: The internal circuit may be faulty.
- Key not recognized at all: The chip may be damaged.
If you see these signs, consider a replacement. You can order a new fob from a dealer or a trusted locksmith. Some aftermarket options work well too. Match the model to your car year and trim. A correct replacement saves time and avoids errors.
Programming may be needed for a new fob. Some keys pair easily. Others need a special procedure. Check your owner manual for the exact steps. If the process feels complex, a professional can help. This is faster than guessing and testing.
Quick Tip
If you buy a spare fob, program it right away. Test it before you need it. A ready spare is a huge help during a dead battery moment. Store the spare in a safe, dry place at home. Do not leave it in a hot car for long periods. Heat can age the battery and the plastic.
Final Thoughts on a Fast Battery Swap
Changing a key battery is a small job with a big payoff. You save money. You avoid a service visit. You also learn a simple skill that helps again and again. With the right battery and a gentle hand, the swap takes only a few minutes.
Remember the main points. Match the battery code. Open the case carefully. Keep the orientation correct. Test the remote before you close the case. Keep a spare battery nearby. These habits make the process smooth every time.
Now you know how to replace the battery in a Toyota key fob with confidence. The next time your remote feels weak, you can fix it fast. A small coin cell can bring your key back to life. That is a simple win you can count on.
Frequently Asked Questions
What battery does a Toyota key fob use?
Most Toyota key fobs use a CR2032 or a CR1632 coin battery. Some older models use a CR2025. Check the label on your old battery to get the exact match.
Can I replace the battery without tools?
Yes, many Toyota fobs open with the emergency key blade or a coin. A small flathead screwdriver helps too. Use gentle pressure and a soft cloth to avoid scratches.
How long does a Toyota key fob battery last?
A good coin battery usually lasts one to three years. The exact life depends on how often you use the remote. Heavy use shortens the battery life.
What if my key still does not work after the battery change?
Check the battery orientation and clean the contacts. Try a fresh battery from a new pack. If it still fails, the fob may need a re-sync or a replacement.
Do I need to program the key after changing the battery?
Usually no. A battery swap does not wipe the key programming. If your car does not recognize the key, try a quick reset by locking and unlocking the car.
Where can I buy a replacement battery for my Toyota key?
You can buy one at auto parts stores, pharmacies, electronics stores, and online. Look for a reputable brand and match the battery code on your old cell.